

Protecting
Pets, People & Planet
Join a group of veterinarians leveraging the latest technologies to deliver excellent care to their patients while being a responsible and positive force for their local and global communities.
100% secure. We do not share your information


Recent Articles
Why Is My Dog's Foot Swollen?
Discover why your dog's foot is swollen, common causes, treatments, and when to see a vet for proper care.
A swollen dog foot is one of the most common reasons owners call their vet. It can be as simple as a bee sting or as serious as a deep infection or bone tumor. The location, speed of onset, and other symptoms all help narrow down the cause.
This guide covers every common cause, how to assess severity at home, and the exact signs that mean your dog needs same-day care.
Quick answer: A swollen dog foot usually has a local cause: injury, insect sting, foreign object, or infection. Warm, increasing, or discharging swelling needs same-day vet care. Multiple swollen paws suggest allergies.
Key takeaways
- Single-paw swelling almost always has a local cause: injury, sting, foreign body, or infection
- Interdigital furunculosis (infected hair follicle cysts between toes) is among the most misidentified causes of recurring paw swelling
- Foreign objects like foxtails and glass splinters can migrate deep into tissue if left untreated
- Pododermatitis is the clinical term for inflamed paw skin; allergies are the most common underlying driver
- Swelling spreading up the leg or paired with face or neck swelling is an emergency requiring immediate care
- Most mild swelling from a sting or minor sprain improves within 24 to 48 hours with rest and monitoring
How to assess your dog's swollen foot before calling the vet
Before looking up causes, do a quick home assessment. This takes two minutes and tells you how urgent the situation is.
Step 1: Which paw?One paw = likely local cause. All four paws = likely allergic or systemic.
Step 2: Feel for heat.Warm or hot tissue means active inflammation or infection.
Step 3: Look between every toe.Redness, swelling between the digits, or visible nodules between the toes points to interdigital furunculosis or a foreign body.
Step 4: Check the pads.Burns appear as red, blistered, or peeling pad tissue. Cuts and punctures are often visible on the pad surface.
Step 5: Look at each nail.A broken nail or swollen nail bed causes localized pain and swelling at the toe tip.
VCA Animal Hospitals: "A deeper infection, like an abscess, will appear as a warm, soft to mildly firm swelling under the skin."
8 common causes of a swollen foot in dogs
1. Injury or trauma
Sprains, cuts, fractured toes, torn nails, and pad burns are the most frequent causes of sudden single-paw swelling. Dogs running on rough, hot, or icy terrain are especially prone.
PetMD notes that pad burns are particularly common in summer: check the pads after any walk on hot pavement. If your palm cannot hold against the pavement for five seconds, it is too hot for your dog's feet.
Signs: sudden lameness after activity, localized swelling, visible wound or bruising.
2. Foreign object
Thorns, glass, foxtails, and grass awns lodge between the toes or penetrate the pad. The body mounts an inflammatory response around the object, causing swelling that worsens over days.
SpectrumCare: "Foxtails and grass awns can lodge between the toes or in the pad and trigger pain, swelling, and infection."
Foxtails are particularly dangerous because they are barbed and can migrate deeper into tissue over days, eventually requiring surgical removal. If you cannot see and safely remove the object, do not probe. See a vet.
3. Insect sting or bite
Bees, wasps, fire ants, and spiders cause rapid single-paw swelling that appears within minutes of the sting. The paw may look puffy and your dog may lick or hold it up.
Dyer Animal Clinic advises watching for anaphylaxis signs: hives, difficulty breathing, excessive swelling spreading beyond the paw. These require emergency care immediately.
Localized sting swelling that stays in the paw and is not worsening can be monitored at home for 24 to 48 hours.
4. Infection: bacterial and fungal
Bacterial or fungal infections enter through cuts, puncture wounds, or damaged skin. Infected paws are typically warm, red, swollen, and often have an odor or discharge. VCA lists the visual signs: "Skin infections on the feet may result in red, moist lesions between the toes."
Pododermatitis (inflammation of the paw skin) is the umbrella clinical term. Common causes include:
- Secondary bacterial infection from chronic licking
- Yeast overgrowth in skin folds between toes
- Fungal infections (ringworm can affect paws)
- Demodectic mange (mite overgrowth)
Pododermatitis does not resolve without treatment. Antibiotics, antifungal medication, or both are typically required.
5. Interdigital furunculosis
This is one of the most commonly missed causes of recurring paw swelling. Interdigital furunculosis occurs when hair follicles between the toes become infected, forming painful reddish-purple nodules that may rupture and drain.
AKC notes that the condition is especially prevalent in short-coated, heavyset breeds: Bulldogs, Labrador Retrievers, and Chinese Shar-Pei are among the most commonly affected. Chronic licking due to allergies is a major driver.
Signs: swollen, painful nodules between the toes, draining tracts, recurrent swelling in the same location.
For how furuncles between the toes connect to abscess formation, see abscess as a cause of limb swelling.
6. Allergic reaction and pododermatitis
Environmental allergens (pollen, grass, lawn chemicals, road salt) and food allergies frequently cause paw inflammation. Dogs with allergies lick their feet chronically, creating secondary infection on top of the allergic reaction.
Wakefield Pet Vet: "Allergic reactions typically cause itching, redness, and sometimes blistering between the toes or on paw pads."
Allergic paw swelling usually affects multiple paws. It tends to recur seasonally or after contact with the trigger substance. Dogs with seasonal allergies often have their worst paw symptoms in spring and fall.
7. Bursitis
Bursae are small fluid-filled sacs that cushion joints. Repeated pressure on bony prominences, especially the elbow and hock, can cause bursitis. Affected joints may appear as soft, fluctuant swellings near a joint.
For how bursitis specifically produces foot and joint swelling, see bursitis as a common cause of foot swelling.
8. Cysts, tumors, and nail bed disease
Cysts, mast cell tumors, and subungual (under-nail) tumors can all present as localized swelling on or near the foot. Petcube notes that toenail tumors are more prevalent in large black-coated breeds such as Standard Poodles, Gordon Setters, and Schnauzers.
A lump that is growing, firm, or pigmented should always be evaluated by a vet rather than monitored at home.
For an overview of lumps that cause swelling on the legs, see lumps that can cause swelling.
Severity triage: what to do right now
Home care for mild cases
For minor swelling without infection signs:
- Keep the dog calm and limit walking
- Soak the paw in warm (not hot) water with Epsom salts for 10 minutes. PetMD recommends this as an excellent short-term measure regardless of cause.
- Gently clean any visible wound with mild soap and warm water
- Apply a cool damp cloth for 10 to 15 minutes to reduce swelling from sprains or stings
- Do not apply antibiotic ointments without vet guidance some formulations are toxic to dogs if licked
For pressure-related paw and leg swelling in dogs that rest in one position for extended periods, see pressure-related swelling in dogs.
Frequently asked questions
How do I treat my dog's swollen paw at home?
For mild swelling with no wound or discharge, rest the dog and soak the paw in warm Epsom salt water for 10 minutes. Check carefully for a foreign object or insect stinger. Do not use human antibiotic creams without vet guidance. If swelling has not reduced within 24 to 48 hours or is getting worse, contact your vet.
When should I be worried about my dog's swollen paw?
Be concerned immediately if the swelling is warm, increasing, or has discharge or odor. Call the vet the same day if your dog refuses to bear weight, if the swelling is spreading up the leg, or if there is any sign of an allergic reaction such as facial swelling or breathing difficulty.
What can I give my dog for a swollen paw?
Do not give human pain medications (ibuprofen, acetaminophen, aspirin) to dogs; many are toxic. For minor swelling, warm Epsom salt soaks are safe and effective for short-term relief. Your vet can prescribe appropriate anti-inflammatory medication if needed after examining the paw.
My dog's foot was normal this morning and is swollen now. What happened?
Sudden single-paw swelling most often means an insect sting, a foreign object picked up during activity, or a minor sprain. Check each toe carefully for a stinger, thorn, or visible wound. If swelling is mild and localized, monitor for 24 hours. If increasing or painful, call the vet the same day.
Can swelling in a dog's foot go away on its own?
Minor swelling from a bee sting or small sprain typically resolves within 24 to 48 hours with rest. Infections, foreign objects, interdigital furunculosis, and bursitis do not resolve without treatment. If swelling has not improved within 48 hours, veterinary assessment is needed.
My dog's foot smells bad and is swollen. Is that serious?
Yes. Odor from a swollen paw strongly indicates infection. A foul smell means bacteria are actively present. Common sources include interdigital furunculosis, a nail bed infection, or an abscess. This requires prompt veterinary treatment and should not be left to resolve on its own.
Resources
- PetMD. Dogs Swollen Paws: Causes and Treatments. petmd.com
- VCA Animal Hospitals. First Aid for Limping Dogs. vcahospitals.com
- AKC. Pododermatitis on Dog Paw: Causes, Symptoms and Treatment. akc.org
- SpectrumCare. Paw Swelling in Dogs. spectrumcare.pet
- Dyer Animal Clinic. Reasons Your Dog's Paw is Swollen. dyeranimalclinic.com
Laser Therapy for Dogs After TPLO Surgery
Learn how laser therapy helps dogs recover faster and with less pain after TPLO surgery for cruciate ligament repair.
Laser therapy also called photobiomodulation (PBMT) or low-level laser therapy (LLLT) is one of the most commonly offered adjunct treatments during TPLO recovery. Many specialist and rehabilitation centres include it routinely.
But the evidence for its benefits is more nuanced than the marketing suggests, and owners deserve an honest picture of what it does and does not reliably achieve.
Quick answer: Laser therapy after TPLO uses specific light wavelengths to reduce inflammation and support tissue healing. Evidence for early pain reduction is moderately supported; evidence for improved radiographic bone healing is weak. It is a safe adjunct but should not replace rehabilitation exercises, pain medication, or activity restriction.
Key takeaways
- Laser therapy reduces postoperative inflammation and may improve gait scores: a TPLO study found better hindlimb function at 8 weeks in treated dogs
- Evidence for improving radiographic bone healing is weak: three controlled studies found no statistically significant difference in healing time
- The 2024 AVMA randomized trial found no significant difference in CRP, weight bearing, pain scores, or SSI rates between PBMT and sham groups
- Sessions typically begin within the first few days of surgery and continue through the rehabilitation phase
- Laser therapy is safe with few contraindications: avoid eyes and active tumour sites; safe over the TPLO incision once closed
- It works best as part of a multimodal plan: exercise therapy and pain medication carry stronger evidence than laser alone
What laser therapy does
Laser therapy for dogs, also known as photobiomodulation, involves using specific wavelengths of light to penetrate tissues and promote cellular regeneration and healing. The laser light stimulates the production of ATP (adenosine triphosphate), enhancing cell repair and growth, reducing inflammation, and increasing blood circulation.
Photobiomodulation therapy has been shown to decrease inflammation, and increase analgesia, vascularization, and tissue healing after musculoskeletal injury or surgery.
The mechanism is photochemical: light energy at specific wavelengths (typically 630 to 980 nm) is absorbed by mitochondria.
This increases ATP production, modulates reactive oxygen species, and influences gene expression related to inflammation and healing.
The effects are local confined to the tissue depth the light reaches.
For post-TPLO use, the targets are: the surgical incision, the osteotomy site in the proximal tibia, and the surrounding periarticular soft tissues.
What the clinical evidence shows
Pain and function
Research following TPLO surgery showed that dogs receiving LLLT had better hindlimb function and gait scores at 8 weeks compared to controls. This is especially valuable in orthopedic recovery, where early weight-bearing can prevent muscle atrophy and joint stiffness.
In a controlled veterinary study, dogs with surgical incisions treated with laser therapy exhibited significantly less inflammatory cell infiltration and tissue necrosis within the first week post-op compared to untreated controls.
The 2024 randomized trial
54 client-owned dogs with CCL rupture undergoing unilateral TPLO surgery were enrolled. The study population was randomly assigned to either a treatment group receiving PBMT (24 dogs) or a control group (30 dogs). PBMT was performed immediately after induction, and at 6 hours, 24 hours, 48 hours, and 8 weeks postoperatively. Evaluation of CRP, pain scores, evidence of SSI, and percentage weight bearing were assessed at all time points.
The trial found the therapy showed promise but no statistically significant difference between groups on any primary outcome measure.
Bone healing
Three studies compared LLLT to a control and concluded that LLLT treatment did not make a significant difference in improving radiographic bone healing. The studies collectively provide weak evidence for this outcome.
This is an important distinction: laser therapy may support soft tissue healing, pain, and early function but it does not appear to accelerate the osteotomy healing visible on radiographs.
When to start and how often
Laser therapy uses focused light energy on the surgical site to support healing.
Most rehabilitation programmes begin laser therapy within the first 1 to 3 days after TPLO surgery, often at the surgical centre before discharge or at the first rehabilitation visit.
Typical post-TPLO laser protocol:
- Frequency: 3 to 5 sessions per week in the first 2 to 3 weeks
- Frequency: 1 to 2 sessions per week from weeks 3 to 8
- Session duration: 5 to 15 minutes depending on the laser system and dosing protocol
- Total sessions: typically 6 to 12 in the first 8-week recovery phase
The protocol varies by laser system, power output, and the individual patient's response.
Realistic expectations
Laser therapy is a useful adjunct in TPLO recovery. It is not a substitute for the treatments with stronger evidence: pain medication, activity restriction, and structured rehabilitation exercises.
Laser therapy could be particularly helpful for dogs with weight-bearing and gait issues while recovering from TPLO surgery after a cruciate injury.
Dogs with significant early swelling, wound sensitivity, or slow initial weight-bearing progress may benefit most. Dogs recovering well with standard multimodal analgesia and rehabilitation may show less measurable difference.
For the bone healing timeline that laser therapy supports during recovery, see TPLO bone healing time in dogs explained.
For the full recovery plan that laser therapy fits into, see 10 essential TPLO recovery tips for pet owners.
For the physical therapy that is the primary evidence-based adjunct, see when to start physical therapy after TPLO surgery.
For swelling management in the recovery period, see how long does swelling last after TPLO surgery.
Frequently asked questions
Is laser therapy safe over the TPLO incision?
Yes, once the incision is closed. Laser therapy is safe over sutured incisions and can be applied at the surgical site from the first post-operative day in most protocols.
Avoid direct application over open wounds or actively infected tissue.
How many laser sessions does a dog need after TPLO?
Typically 6 to 12 sessions across the first 8 weeks.
Start at 3 to 5 sessions per week for the first 2 to 3 weeks, tapering to 1 to 2 per week through the rehabilitation phase.
The exact protocol depends on the laser system and rehabilitation plan.
Does laser therapy replace pain medication after TPLO?
No. Laser therapy is an adjunct to pharmaceutical pain management, not a replacement. Post-TPLO pain management requires NSAIDs, and often gabapentin or other analgesics.
Laser therapy may reduce the pain burden and support earlier mobility but does not provide sufficient analgesia on its own.
Can I do laser therapy at home with a consumer device?
Consumer-grade red light therapy devices exist but operate at lower power densities than veterinary therapeutic lasers. The clinical evidence discussed in this article relates to veterinary-grade PBMT devices.
Home devices may offer some benefit but cannot replicate the dosing of professional equipment. Discuss with your rehabilitation veterinarian before purchasing.
Will laser therapy prevent my dog from needing more medication?
Possibly. If laser therapy reduces post-operative inflammation and pain, some dogs may need lower doses of pain medication or taper off sooner.
This should be guided by your veterinarian based on your dog's individual recovery trajectory.
Resources
- AVMA Journal. Photobiomodulation Therapy in Dogs Undergoing TPLO After Cranial Cruciate Ligament Rupture. avmajournals.avma.org
- Veterinary Evidence. Does LLLT Improve Radiographic Healing for Dogs with CCL Rupture Undergoing TPLO Surgery? veterinaryevidence.org
- AKC. Laser Therapy For Dogs: Uses, Side Effects, and Alternatives. akc.org
- Erchonia. Laser Therapy for Post-Surgical Recovery in Pets. erchonia.com
All Articles
TPLO Surgery Pros and Cons for Dogs
Explore the pros and cons of TPLO surgery for dogs with cruciate ligament injuries to make informed decisions about your pet's care.
Sustainable Vet Group
TPLO surgery tibial plateau leveling osteotomy is the most commonly recommended surgical treatment for cranial cruciate ligament (CCL) rupture in dogs in the United States.
For the right dog, it reliably restores function. For some dogs, the cost, recovery demands, and surgical risks may outweigh the benefits.
Understanding both sides helps you make an informed decision with your veterinarian.
Quick answer: TPLO surgery achieves 93% functional success and durable mechanical stability. Cons include $3,000 to $6,000+ cost per leg, 10 to 16 weeks of strict recovery, a 14 to 34% complication rate, and a 30 to 50% chance the other knee eventually ruptures.
Key takeaways
- 93% of dogs regain good limb function after TPLO, based on a 2013 clinical outcomes study
- TPLO is the gold standard for medium-to-large breed dogs: ACVS recommends it as first choice for CCL rupture in dogs over 60 lbs
- Overall complication rate is 14 to 34%: fewer than 10% of cases require a second surgery
- Infection occurs in approximately 6% of cases and is the most common serious post-TPLO complication
- Recovery takes 10 to 16 weeks of strict rest, the most demanding aspect of TPLO for most families
- Cost ranges from $3,000 to $6,000+ per leg one of the most significant disadvantages for many dog owners
What is TPLO surgery?
TPLO surgery addresses CCL rupture by changing the mechanics of the stifle (knee) joint rather than replacing the torn ligament.
The surgeon makes a curved cut in the top of the tibia and rotates the bone segment to flatten the tibial plateau angle, typically to around 5 degrees.
This eliminates the forward sliding force that the CCL normally resists, allowing the dog to bear weight without a functioning ligament.
According to the American College of Veterinary Surgeons (ACVS), TPLO is currently the most commonly recommended procedure for CCL rupture in large and active dogs.
To understand the full surgical process, see what is TPLO surgery in dogs.
Pros of TPLO surgery
High success rate
A 2013 clinical study published in veterinary literature found that TPLO patients achieved a 93% restoration of limb function at one year post-surgery.
This is consistently among the highest success rates of any CCL repair technique.
Vetamac reports that TPLO has higher success rates and lower complication rates compared to extracapsular repair (lateral suture) in medium and large breed dogs.
Most dogs return to running, playing, and normal daily activity with minimal long-term limitations.
Durable mechanical stability
TPLO works by fundamentally changing joint mechanics not by substituting a suture for the torn ligament.
This means the stability it provides does not depend on the integrity of a synthetic material that can loosen over time.
Extracapsular repair relies on periarticular fibrosis to maintain long-term stability after the suture eventually loosens.
TPLO does not have this limitation, making it more reliable in active dogs where joint forces are higher.
Slower arthritis progression
Osteoarthritis will develop in any stifle affected by CCL disease, regardless of treatment.
However, restoring joint stability through TPLO slows the rate of cartilage loss and reduces the severity of arthritis compared to untreated or inadequately stabilized joints.
VCA Animal Hospitals notes that TPLO offers better long-term stability and faster recovery than conservative management.
This makes it the preferred choice for many veterinarians treating CCL injuries in active dogs.
Earlier return to function
Dogs typically begin bearing weight within days of TPLO surgery. Most are walking on the operated leg within the first week and show progressive improvement through weeks 6 to 12.
This earlier functional return benefits active working dogs and reduces muscle atrophy during recovery.
Cons of TPLO surgery
High cost
TPLO surgery costs $3,000 to $6,000 per leg at specialist centres in the US, and higher in major metropolitan areas. Bilateral cases (both knees) can reach $8,000 to $12,000 total.
Additional costs include preoperative diagnostics, post-operative pain medication, follow-up radiographs, and rehabilitation therapy. This is one of the most significant barriers for many families.
Long, demanding recovery
Recovery after TPLO requires 10 to 16 weeks of strict activity restriction. Dogs must be confined, leashed at all times outdoors, and prevented from running, jumping, or using stairs.
For active dogs and their owners this is one of the hardest aspects of TPLO.
The bone takes at least eight weeks to heal. Premature activity is one of the leading causes of post-surgical complications and implant failure.
See 10 essential TPLO recovery tips for pet owners for the full recovery guide.
Complication risk
Vetamac reports that complication rates following TPLO surgery range from 14 to 34%, with fewer than 10% requiring a second surgery. The most frequent complications include:
- Surgical site infection: approximately 6% of cases
- Implant loosening or failure: less common but can require plate removal
- Late meniscal tear: occurs in 2 to 4% of cases after surgery
- Seroma or hematoma: fluid accumulation under the incision
- Tibial crest fracture: rare but serious
For the complete list, see 15 common complications after TPLO surgery in dogs. For the overall failure rate, see TPLO failure rate in dogs explained.
Not appropriate for all dogs
TPLO is not the best option for every dog. Very small dogs (under 15 to 20 lbs) often achieve equivalent outcomes with extracapsular repair at significantly lower cost and complexity.
Dogs with serious concurrent medical conditions significant cardiac, renal, or hepatic disease may be higher anesthetic risks than the procedure warrants.
Most surgeons consider TPLO the optimal choice for young, active, large-breed dogs. For older dogs, the decision involves more nuance. See TPLO surgery for older dogs for the full discussion.
30 to 50% risk of the other knee rupturing
One of the most important facts owners often learn after surgery: 30 to 50% of dogs that rupture one CCL will eventually rupture the other.
This is not a failure of TPLO both ligaments degenerate simultaneously. However, it means many families face a second surgery within 1 to 2 years.
TPLO pros and cons: summary table
For the full comparison of surgical alternatives, see alternatives to TPLO surgery for dogs. For long-term outcomes data, see long-term outcomes of TPLO surgery.
Frequently asked questions
Is TPLO surgery worth the cost?
For active, medium-to-large breed dogs with complete CCL rupture, the evidence strongly supports TPLO as worth the investment.
A 93% functional success rate and durable mechanical stability justify the cost for most families. For very small or elderly dogs, alternatives may offer equivalent outcomes at lower cost and surgical risk.
What is the biggest downside of TPLO surgery?
Most owners cite the 10 to 16 week activity restriction as the hardest part more challenging in practice than anticipated. Cost is the second most common concern.
From a medical standpoint, the 14 to 34% complication rate is the main clinical disadvantage, though most complications are manageable without a second surgery.
Can a dog live a normal life after TPLO?
Yes. The ACVS notes that the majority of dogs return to full activity including running and playing.
Long-term management may include joint supplements, weight management, and monitoring for arthritis but the vast majority of dogs live active, comfortable lives after successful TPLO recovery.
How does TPLO compare to extracapsular repair?
TPLO has higher success rates in medium and large breed dogs and provides more reliable long-term stability.
Extracapsular repair (lateral suture) is less expensive and less invasive but is generally not recommended for dogs over 30 lbs due to higher long-term failure rates in larger, more active patients.
What happens if TPLO surgery is not done?
Without surgical stabilization, CCL rupture causes progressive joint instability, ongoing meniscal damage, pain, and rapid osteoarthritis progression. In large dogs, conservative management produces significantly worse long-term outcomes than surgery.
Small dogs under 15 lbs sometimes achieve acceptable function without surgery, but even in them, surgery typically produces better results.
Resources
- ACVS. Cranial Cruciate Ligament Disease. acvs.org
- Vetamac. TPLO Surgery for Dogs: Success Rates and Alternative Options. vetamac.com
- Animal Outpatient Surgery. Is TPLO Surgery Worth It? animaloutpatientsurgery.com
- VCA Animal Hospitals. Tibial Plateau Leveling Osteotomy (TPLO) in Dogs. vcahospitals.com

PROM Exercises for Dogs After TPLO Surgery
Learn safe and effective PROM exercises for dogs after TPLO surgery to aid recovery and improve joint mobility.
Sustainable Vet Group
PROM passive range of motion is one of the first rehabilitation exercises prescribed after TPLO surgery in dogs.
It prevents joint stiffness, reduces scar tissue formation, and keeps the stifle flexible during the weeks when your dog cannot yet bear full weight on the operated leg.
Done correctly, it is safe, gentle, and straightforward. Done incorrectly, it risks disrupting the healing osteotomy.
Quick answer: Start PROM 2 to 5 days post-TPLO. Dog on their side, operated leg up — flex and extend the stifle gently for 10 reps, 3 times daily. Never force the joint. Ice for 5 to 10 minutes after each session.
Key takeaways
- PROM begins 2 to 5 days after TPLO: starting too early stresses the healing osteotomy; follow your surgeon's timeline
- Correct position: dog on their side, operated leg up; support the leg above and below the stifle with both hands
- 10 repetitions, 3 times daily: the standard protocol recommended by Veterinary Specialty Center and Midwest Veterinary Specialists
- Never force the joint: move only within the pain-free range; stop if your dog vocalizes, flinches, or tenses
- Follow PROM with a cold pack: 5 to 10 minutes of icing after each session reduces post-exercise swelling
- Discontinue PROM around weeks 6 to 8 when your dog approaches near-full range of motion
What is PROM and why does it matter after TPLO?
Passive range of motion means you move your dog's leg through its natural range of motion your dog's muscles are completely relaxed.
This is different from active exercises where the dog uses their own muscles.
After TPLO surgery, the stifle joint is swollen, painful, and protected by surrounding muscles that naturally tighten to guard the injury.
Without gentle movement, this guarding leads to stiffness, scar tissue adhesion, and reduced joint flexibility that can persist long after the bone has healed.
Midwest Veterinary Specialists explains that for the first two weeks after TPLO, the main rehabilitation goals are to decrease pain and maintain range of motion in the stifle joint.
PROM is one of the primary tools for achieving this in the early phase.
PROM also improves local circulation to the healing tissues, reduces swelling, and maintains the nerve pathways that control normal limb movement all of which support faster recovery.
When to start PROM after TPLO
Most surgeons prescribe PROM beginning 2 to 5 days after surgery. TPLO Info recommends starting passive range of motion exercises and icing as early-phase rehabilitation cornerstones in the first two weeks.
Veterinary Specialty Center's post-TPLO protocol specifies PROM starting in the early post-operative period with 10 slow repetitions 3 times daily, followed by an ice pack.
Do not begin earlier than your surgeon advises. The osteotomy site needs initial stability before mechanical stress is introduced. Your surgeon's discharge instructions take priority over general guidelines.
How to perform PROM: step-by-step
Setup
Position your dog lying on a comfortable, non-slip surface a yoga mat or folded blanket works well. The operated leg should be facing up.
If your dog is uncomfortable lying on their side, some surgeons allow PROM with the dog standing, though lying down is generally more controlled.
Hand position
Place one hand above the stifle (on the thigh) and your other hand below the stifle (around the lower leg/hock area).
This two-hand support prevents any rotation or twisting of the joint during movement.
Edmonton West Animal Hospital advises supporting the leg with one hand to prevent twisting, using the other to gently bend and straighten the leg.
The movement
Flex the stifle by gently bringing the lower leg toward the body (bending the knee), then extend it back to a neutral position.
The motion should be smooth, slow, and continuous a gentle bicycle-pedaling motion as described by Veterinary Specialty Center.
Move only to the point where you feel natural resistance. The goal is to maintain and gradually improve range not to force progress.
Each cycle (one flex and one extension) counts as one repetition.
Repetitions and frequency
- 10 repetitions per session
- 3 sessions per day
- Space sessions throughout the day: morning, afternoon, and evening
TPLO Info confirms PROM can be performed three times daily for 10 to 15 repetitions each.
After each session
Apply a cold pack (frozen peas wrapped in a thin towel work well) over the stifle for 5 to 10 minutes after PROM.
Veterinary Specialty Center specifies icing after PROM for 5 to 10 minutes, 3 times daily for at least the first 3 days.
Cold therapy reduces the local inflammation that gentle exercise naturally produces, keeping the joint comfortable between sessions.
Warm packs before PROM (weeks 2 onward)
After the first 5 days, Midwest Veterinary Specialists recommends applying warm packs before PROM sessions to relax the tissues and increase blood flow.
Warming before exercise improves the flexibility of the surrounding muscles and makes the movement more comfortable for your dog.
Apply a warm (not hot) damp towel or heat pack for 5 minutes before beginning. Do not apply heat in the first 5 days when active inflammation is at its peak.
What NOT to do during PROM
- Do not push past the point of resistance forcing the joint can damage healing tissue
- Do not perform PROM if your dog is acutely distressed or in significant pain
- Do not skip the cold pack afterward this step reduces unnecessary post-exercise swelling
- Do not perform PROM with the dog standing in the first 2 weeks unless specifically instructed
- Do not increase repetitions or speed without veterinary guidance
When to stop PROM
PROM is discontinued when your dog achieves near-full range of motion typically around weeks 6 to 8. At this point, your dog transitions to active weight-bearing exercises that build muscle strength.
Veterinary Specialty Center's protocol specifies discontinuing PROM sometime during the 3- to 6-week phase when achieving almost full range of motion, transitioning to slow leash walks and sit-to-stand exercises.
For the full range of motion exercise progression that follows PROM, see TPLO range of motion exercises for dogs.
For the broader rehabilitation program that PROM fits into, see TPLO rehab exercises for dogs. For the physical therapy timeline, see when to start physical therapy after TPLO surgery.
Frequently asked questions
How do I know if I'm doing PROM correctly?
Your dog should remain relaxed throughout. A correctly performed PROM session produces no tensing, flinching, or vocalization.
If your dog stiffens or reacts, you have either gone too far in range or are moving too quickly. Slow down and reduce the range.
Ask your vet or rehabilitation therapist to demonstrate the technique at the first post-op recheck.
My dog won't stay still for PROM. What should I do?
This is common, especially in the first few days when the dog is in pain and confused. Keep sessions short, use a calm voice, and try high-value treats to hold attention.
Some dogs respond better to PROM immediately after a short leash walk when they are slightly tired.
If your dog is too distressed to cooperate, contact your surgeon adequate pain management is essential for PROM compliance.
Can PROM hurt my dog's TPLO repair?
When performed correctly within the pain-free range of motion, PROM does not stress the osteotomy.
The forces generated during gentle passive flexion and extension are far below what would disrupt the fixation plate.
The key safeguard is never forcing the joint stay within comfortable range and stop if resistance is met.
Should I do PROM on the other (unaffected) legs too?
Yes. Post-TPLO Info notes that PROM can also be performed on the other three limbs, as they compensate for the injured leg and are under increased load during recovery.
Gentle range of motion work on all limbs supports overall flexibility and comfort.
What happens if I miss PROM sessions?
Occasional missed sessions are not catastrophic, but consistency matters. Regular PROM prevents the progressive stiffening and scar tissue formation that makes rehabilitation harder as weeks pass.
Aim to complete all three daily sessions, and communicate with your surgeon if you are struggling to keep up with the protocol.
Resources
- Veterinary Specialty Center. TPLO Aftercare for Pets. vetspecialty.com
- Midwest Veterinary Specialists. Post-Operative Care and Rehabilitation Following TPLO. midwestveterinaryspecialists.com
- TPLO Info. Rehab for Dogs After TPLO Surgery. tploinfo.com
- Edmonton West Animal Hospital. TPLO Rehabilitation Guide. vetinedmonton.com
- PMC. Effects of Underwater Treadmill Programme on Canine Joint Range of Motion. ncbi.nlm.nih.gov
Fluid Buildup After TPLO Surgery in Dogs
Learn about fluid buildup after TPLO surgery in dogs, its causes, symptoms, treatment, and prevention to ensure your pet's smooth recovery.
Sustainable Vet Group
Some degree of fluid accumulation after TPLO surgery is normal and expected.
The surgery involves cutting and rotating the tibia a significant tissue injury that triggers an inflammatory response, part of which is fluid production.
The question is not whether fluid will appear, but whether the fluid you are seeing is a normal healing response or a sign of something that needs attention.
Quick answer: Fluid buildup after TPLO is usually a seroma — clear serum under the skin that is not an infection. Small seromas resolve in 1 to 3 weeks with rest. Call your vet if swelling is hot, rapidly growing, producing discharge, or accompanied by fever.
Key takeaways
- Seroma is the most common fluid buildup after TPLO: clear serum under the skin, not an infection, resolving with rest in 1 to 3 weeks
- Small seromas are managed with rest: the body reabsorbs the fluid naturally; no intervention is needed for most small seromas
- Large or persistent seromas may require needle aspiration: this must be done under sterile veterinary conditions; never drain at home
- Ankle swelling at 3 to 5 days post-surgery is normal: gravity pulls post-surgical fluid downward to the ankle; TPLO Info confirms this is routine
- Warning signs requiring vet contact: rapidly increasing swelling, warmth, redness, pus, foul odor, fever, or lethargy
- Activity restriction is the most important prevention: excessive movement is the leading cause of seroma formation after TPLO
What is fluid buildup after TPLO surgery?
Fluid buildup after TPLO surgery typically takes one of two forms: seroma or post-surgical edema.
A seroma is a collection of serum the clear, protein-rich fluid component of blood that leaks from disrupted blood vessels and lymphatic channels during surgery.
It pools in the dead space beneath the skin at the surgical site. Seromas feel soft, fluctuant (squishy), and are usually not warm or painful when small. They are not infections.
Post-surgical edema is broader tissue swelling caused by the inflammatory response to surgery.
This is expected in the first few days after any major orthopedic procedure and typically peaks at 48 to 72 hours before gradually resolving.
Both are distinct from hematoma (a collection of blood) and from infectious fluid (which appears purulent, has an odor, and accompanies systemic illness signs).
Why fluid builds up after TPLO
TPLO surgery creates significant soft tissue disruption.
The curved osteotomy cut, muscle retraction, and plate placement create dead space under the skin.
Fluid accumulates in this space before the tissues close together during healing.
Key contributing factors:
Excessive activity after surgery: the most preventable cause. Every time the operated leg moves beyond gentle weight-bearing, tissue planes are disrupted and more serum leaks into the dead space. TPLO Info confirms that the most common post-surgical cause of seroma is excessive movement of the knee.
Surgical technique: a longer or more complex procedure increases tissue disruption and the resulting dead space. Most surgeons use subcutaneous sutures and tissue closure techniques to minimize this, but some seroma formation remains common even with optimal technique.
Dog size and body composition: larger dogs and those with more subcutaneous fat tend to have more dead space at the osteotomy site and are more prone to seroma formation.
Licking or chewing at the incision: disrupts the healing wound edges and can introduce bacteria into a seroma, converting a benign fluid collection into an infected abscess. The E-collar must remain on at all times.
Normal vs. abnormal fluid buildup: how to tell the difference
Treatment options
Observation and strict rest: for small seromas (under 2 to 3 cm), the standard approach is to enforce activity restriction and allow the body to reabsorb the fluid. Small seromas typically resolve within 1 to 3 weeks. Cold compresses in the first few days reduce new inflammation.
Needle aspiration: large or uncomfortable seromas may be drained by your veterinarian using a sterile needle and syringe. This is a simple outpatient procedure but must be performed aseptically to avoid introducing infection. Never drain a seroma at home.
Compression bandaging: gentle compressive bandaging reduces the dead space available for fluid accumulation and can help prevent reformation after aspiration. This is typically applied by the veterinarian.
Surgical drain placement: if fluid continues to accumulate despite aspiration, a closed suction drain can be placed temporarily. This is rarely needed but is an option for persistent, large seromas.
Antibiotics: only if bacterial infection is confirmed or strongly suspected. Most seromas do not require antibiotics. Prescribing antibiotics for a non-infected seroma is not appropriate and contributes to antimicrobial resistance.
When to contact your veterinarian
Contact your vet promptly if you notice any of the following:
- Swelling that is rapidly increasing in size, especially in the first week
- The swollen area becomes warm, red, or painful to touch
- Any discharge, pus, or unusual odor from the incision or the swollen area
- Your dog develops fever, lethargy, loss of appetite, or stops bearing weight
- The seroma persists beyond 3 to 4 weeks without improvement
For the related article on incision site complications, see seroma in dogs after TPLO surgery. For the full complications overview, see 15 common complications after TPLO surgery in dogs.
For incision infection specifics, see TPLO incision infection symptoms and prevention.
Frequently asked questions
Is it normal to have a lump under the TPLO incision?
Yes, in most cases. A soft, non-painful lump that develops within the first 1 to 2 weeks under the TPLO incision is typically a seroma.
As long as it is not hot, rapidly growing, or producing discharge, it is usually a benign post-operative finding. Monitor it daily and report any changes to your vet.
How long does post-TPLO swelling last?
Most post-surgical edema resolves within 3 to 7 days as the acute inflammatory phase subsides.
Seromas take longer typically 1 to 3 weeks for small ones, and potentially 4 to 6 weeks for larger ones if they reform after aspiration.
Can I massage the fluid away?
Gentle massage around (not directly over) the incision can encourage local circulation, but vigorous massage of a seroma risks rupturing it and introducing bacteria.
TPLO Info notes that ankle swelling that develops 3 to 5 days post-surgery can be massaged and iced. For the surgical site itself, follow your vet's specific guidance.
What happens if a seroma is left untreated?
Most small seromas reabsorb on their own without problems.
A larger seroma that is not treated may persist for weeks or months, become uncomfortable due to pressure, or rarely become infected if bacteria enter through the overlying skin.
Monitoring and reporting changes to your vet is the key strategy.
Can my dog's activity level cause more fluid to build up?
Yes. Excessive activity is the most preventable cause of seroma formation and recurrence after aspiration. Every unnecessary movement of the operated leg disrupts healing tissue planes and drives more fluid production.
Strict confinement and leash-only activity are essential.
Resources
- TPLO Info. Recovery FAQs. tploinfo.com
- Vetplayas. Understanding Swelling After TPLO Surgery. vetplayas.com
- VCA Animal Hospitals. Seroma in Dogs. vcahospitals.com
- ACVS. Cranial Cruciate Ligament Disease. acvs.org
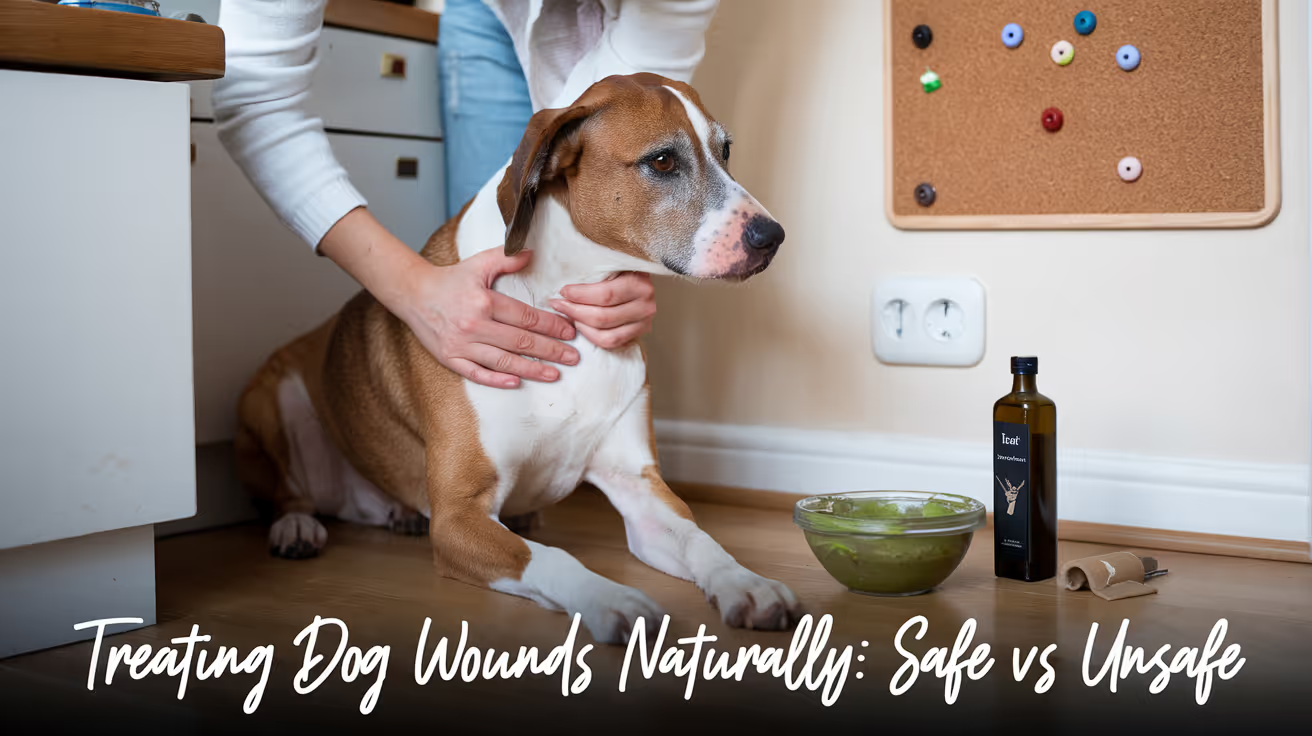
Treating Dog Wounds Naturally: Safe and Unsafe Methods
Learn safe and natural ways to treat dog wounds at home, including what remedies to avoid for your pet's health and healing.
Sustainable Vet Group
Treating Dog Wounds Naturally: Safe and Unsafe Methods
The internet is full of natural wound remedies for dogs. Some have real evidence behind them. Others cause serious harm to healing tissue.
Knowing which is which can mean the difference between a wound that heals well and one that becomes infected, chemically damaged, or toxic.
The safest and most effective home treatments are saline solution, medical-grade Manuka honey, and dilute chlorhexidine. Hydrogen peroxide, rubbing alcohol, tea tree oil, and undiluted iodine all damage tissue and must be avoided.
Natural treatment works for minor wounds only. Any wound with pus, spreading redness, deep tissue involvement, or systemic signs needs veterinary care, not home remedies.
When Home Treatment Is and Is Not Appropriate
Before reaching for any remedy, you need to assess the wound honestly.
Minor wounds you can manage at home include small surface scrapes and shallow abrasions with no debris, shallow cuts under half an inch that have stopped bleeding, and minor skin irritation around an already-healing area.
Wounds that need a vet regardless of home remedy interest include any wound showing pus, foul odor, spreading redness, or heat. Bite wounds and puncture wounds of any size need professional assessment. So do wounds over a joint, wounds that gape or involve deep tissue, and any wound accompanied by lethargy, reduced appetite, or fever.
For guidance on healthy vs infected wounds, that guide covers the full range of signs that separate a manageable wound from one requiring professional help.
How to Clean a Dog Wound at Home: Step-by-Step
Before applying any remedy, the wound needs to be cleaned correctly. Skipping this step is one of the most common mistakes owners make.
Here is the basic process for a minor wound:
- Stay calm and keep your dog still. If needed, ask someone to help hold your dog.
- Gently clip hair away from the wound edges if accessible. This helps you see the wound and prevents hair from trapping bacteria.
- Flush the wound with sterile saline using gentle syringe pressure. Do not scrub. Irrigation removes debris more effectively and causes less tissue damage than wiping.
- Pat the area dry with a clean cloth or gauze. Do not rub.
- Apply your chosen safe treatment (see options below).
- Cover with a clean, non-stick dressing if the wound is in a location where it will be rubbed or contaminated.
- Fit an E-collar to prevent licking. No natural wound treatment works if the dog can access the wound.
Repeat cleaning two to three times daily for active wounds. Monitor daily for signs of infection.
Safe Natural and Gentle Wound Treatments
Saline Solution
Sterile saline (0.9% sodium chloride in water) is the gold standard for wound irrigation at home. It is gentle enough not to damage healthy tissue, effective at removing debris and surface bacteria, and widely available as a pre-made wound wash.
Irrigate directly into the wound using gentle syringe pressure. Use at each cleaning session, typically two to three times daily for active wounds.
For a DIY option, dissolve one teaspoon of table salt in two cups of clean water. Use within 24 hours.
Medical-Grade Manuka Honey
Manuka honey is produced from the Leptospermum scoparium plant in New Zealand and Australia. It contains methylglyoxal (MGO), a compound with documented antibacterial activity against a wide range of bacteria, including antibiotic-resistant strains such as MRSA and MRSP.
Research published in the Journal of Applied Microbiology confirms Manuka honey inhibits Staphylococcus pseudintermedius, the most common cause of dog skin infections, including drug-resistant strains.
The distinction between honey types matters here:
- Medical-grade Manuka honey (UMF 10+ or MGO 263+): appropriate for minor wounds
- Standard raw honey: not recommended, inconsistent potency and risk of contamination
- Grocery store processed honey: not appropriate, heat processing removes active compounds
Apply a thin layer to the wound surface, cover with a clean non-stick dressing, and change daily. Do not use on deep wounds or established infections without veterinary guidance. Most dogs find honey appealing, so E-collar use is essential.
Dilute Chlorhexidine Solution
Chlorhexidine is a pharmaceutical antiseptic, not a natural remedy in the traditional sense. It is included here because it is frequently recommended as the safest home antiseptic for dog wounds when diluted correctly.
At 0.05% concentration, chlorhexidine is safe for wound contact and effective against bacteria, yeasts, and some viruses. This is fifty times more dilute than the standard 2.5% concentrate. Ask your vet for the correct dilution and product guidance before use.
Do not use concentrated chlorhexidine directly on wounds.
Aloe Vera (Fresh Gel Only)
Fresh aloe vera gel has documented anti-inflammatory and wound-healing properties. The National Center for Biotechnology Information has reviewed evidence showing aloe gel can reduce inflammation, support tissue repair, and provide mild antimicrobial activity.
For dogs, use only fresh gel taken directly from an aloe leaf, or a pure veterinary-grade aloe gel with no additives. Many commercial aloe products contain additional ingredients like alcohol, fragrance, or preservatives that are not safe for dogs.
Apply a thin layer to the wound surface. Do not use on deep or infected wounds. Keep the E-collar on, as some dogs will lick aloe gel aggressively.
Do not confuse the clear gel with aloe latex (the yellow layer just under the skin of the leaf). Aloe latex is a laxative and can cause digestive problems in dogs.
Calendula Rinse
Calendula (Calendula officinalis) is a flowering plant with a documented history in wound care. Studies cited by the American Botanical Council confirm calendula extract has anti-inflammatory and mild antimicrobial properties.
A cooled calendula tea rinse applied gently to the skin around a minor wound may reduce redness and support early healing. Use only for superficial skin irritation around a nearly-healed wound, not for open, infected, or discharging wounds.
Steep dried calendula flowers in hot water for fifteen minutes, allow to cool completely, then gently apply with a clean cloth.
Coconut Oil
Coconut oil contains lauric acid and medium-chain fatty acids with mild surface antimicrobial properties. It is non-toxic and well-tolerated by most dogs.
It is most useful for keeping the skin around a healing wound from drying and cracking, and for very minor superficial scratches on intact skin. It is not appropriate for open, infected, or discharging wounds, and it does not replace antiseptic cleaning.
Most dogs will lick coconut oil immediately, so it is only practical on wounds the dog cannot reach.
Natural Treatments to Avoid: What Causes Harm
Hydrogen Peroxide
This is the most commonly misused wound treatment in dog care. It bubbles when applied, and owners interpret that as cleaning. What it actually does is destroy healthy cells.
The oxidative action that kills bacteria also kills fibroblasts (the cells responsible for wound repair) and disrupts granulation tissue. Each application sets back tissue repair. The bubbling can also drive debris deeper into the wound rather than removing it.
Do not use hydrogen peroxide on dog wounds. This applies to all wound types, at all concentrations.
Rubbing Alcohol
Rubbing alcohol causes significant pain and burning on contact with open tissue. It destroys healing cells just as hydrogen peroxide does, dries wound tissue, and creates a hostile environment for cell migration. It provides no benefit over saline for wound cleaning.
Never use rubbing alcohol on dog wounds.
Tea Tree Oil
Tea tree oil is toxic to dogs whether applied topically or ingested. Toxicity signs include weakness and muscle tremors, loss of coordination, drooling and vomiting, skin redness at the application site, and in severe cases, liver damage.
Tea tree oil should never be used on dogs at any concentration. This includes products marketed as pet-safe that contain any percentage of tea tree oil.
Undiluted Iodine (Betadine at Full Concentration)
Betadine at its standard 10% concentration causes chemical burns to exposed tissue, delays healing, and can be absorbed systemically if used extensively on large wounds.
Diluted povidone-iodine at 0.1 to 0.5% concentration (a pale tea color when mixed with water) is safe for wound use and is sometimes used in veterinary practice. The product straight from the bottle is not safe on open wounds.
Apple Cider Vinegar
Apple cider vinegar is acidic and causes irritation and tissue damage when applied to open wounds. It is not appropriate for wound care in dogs despite being widely suggested online.
Some sources recommend white distilled vinegar as a rinse for very minor surface irritation. Even this use should be avoided on open or broken skin as the acidity disrupts the wound environment.
Most Essential Oils
Many essential oils are toxic or irritating to dogs. Tea tree oil is toxic. Eucalyptus oil and pennyroyal oil are toxic. Clove oil is irritating and potentially toxic. Even lavender oil, while safer than the others, is not recommended on open wounds.
Avoid all essential oils on or near dog wounds unless a veterinarian specifically approves a particular product for this use.
Safe vs. Unsafe: Quick Reference
What Natural Methods Cannot Do
Natural treatments can support the conditions for healing in minor wounds. They cannot clear an established bacterial infection, replace systemic antibiotics for wounds with significant infection, treat abscess formation or deep tissue infection, or prevent spreading infection from reaching the bloodstream.
One reason deeper wound infections are harder to treat at home is biofilm. Biofilm is a layer of bacteria that adheres to wound tissue and protects bacteria from antiseptic agents. Once biofilm has formed, surface-level natural antiseptics are not sufficient. This is why wounds that look minor can progress to serious infections when home treatment is delayed or incorrect.
For treating an infected dog wound, that guide covers the full treatment picture including when antibiotics are required and what the protocol looks like.
The Role of Licking Prevention in Natural Wound Care
No natural wound treatment works if the dog can access the wound.
Saliva introduces bacteria. Licking removes whatever was just applied. The mechanical action of the tongue disrupts healing tissue and breaks down forming granulation.
E-collar or recovery suit use is not optional regardless of which wound treatment you choose. For why dogs lick wounds despite the instinct behind it, that guide explains the biological mechanisms through which licking worsens infections.
Tracking Healing When Using Natural Methods
If you are managing a minor wound at home, daily monitoring tells you whether things are on the right track.
Signs the wound is responding well include redness reducing each day, no new discharge developing after day one, the wound visibly shrinking or closing, and your dog showing less interest in the area.
Signs you need veterinary care:
- Discharge appears, especially yellow, green, or thick
- Redness spreads beyond the wound margin
- The wound shows no visible improvement after 48 hours of care
- Your dog shows systemic signs like lethargy or reduced appetite
- Any foul or unusual odor from the wound
For infected wound healing stages and what progression should look like at each stage, that guide provides the stage-by-stage framework for monitoring at home.
Frequently Asked Questions
Can I use Neosporin on my dog's wound?
Use with caution. Some Neosporin formulations contain polymyxin B, which is generally safe for topical use on dogs. However, Neosporin is designed for human skin, dogs will lick it off immediately, and it provides minimal benefit over saline for most minor wounds. Ask your vet before using it, and always use an E-collar if you apply it.
Is coconut oil antibacterial enough to use on infected wounds?
No. Coconut oil has mild surface antibacterial properties but is not strong enough to address an established wound infection. It is appropriate as a surface moisturizer around a healing wound, not as a treatment for infected tissue.
What can I put on a dog wound to help it heal faster?
The most evidence-backed home approach is saline irrigation two to three times daily, an E-collar to prevent licking, and daily monitoring. Medical-grade Manuka honey can be added for minor surface wounds. Aloe vera gel (fresh and pure) is a reasonable addition for superficial irritation. Everything else is either less supported or potentially harmful.
My dog ate some of the honey I applied. Is that dangerous?
Medical-grade Manuka honey in small amounts is not toxic to dogs. However, honey is high in sugar. If your dog is diabetic or weight-sensitive, contact your vet. This also illustrates why E-collar use is essential when applying any topical treatment.
Can I use diluted apple cider vinegar on a dog wound?
No. Apple cider vinegar is acidic and causes irritation and tissue damage when applied to open wounds. Despite being widely suggested online, it is not appropriate for wound care in dogs.
Is aloe vera safe for dogs?
Pure, fresh aloe vera gel is safe for topical use on dogs in small amounts. However, the aloe latex (the yellow layer just under the leaf skin) is a laxative and is not safe for dogs. Many commercial aloe products also contain additives like alcohol, fragrance, or preservatives that are not safe. If your dog licks the gel, pure aloe vera gel is not toxic in small quantities, but it can cause mild digestive upset.
Can natural remedies treat biofilm in wounds?
Generally no. Biofilm is a structured community of bacteria that adheres to wound tissue and protects bacteria from many antiseptic agents. Standard natural remedies like saline and Manuka honey have limited ability to penetrate established biofilm. Manuka honey has some anti-biofilm evidence in laboratory studies, but once biofilm is established in a clinical wound, veterinary treatment is the appropriate next step.
This article is for informational purposes only and is not a substitute for professional veterinary advice. Every case is unique. Always consult your veterinarian for guidance specific to your pet.
Resources
- Whole Dog Journal. Natural Antiseptics for Dog Wounds. whole-dog-journal.com
- PetMD. Dog Wound Care: How to Clean and Treat Dog Wounds at Home. petmd.com
- American Kennel Club. Should Dogs Lick Wounds? How Saliva Affects Wound Healing. akc.org
- Institute for Environmental Research and Education. What Is the Best Natural Antiseptic for Dog Wounds? iere.org
- Can Dogs Eat It. 3 Natural Antiseptics for Dog Wounds for Safe Healing. candogseatit.com
- The Natural Dog Store. Treating Dog Wounds Naturally at Home. thenaturaldogstore.com

Ankle Swelling After TPLO Surgery in Dogs
Learn about causes, symptoms, and treatment of ankle swelling after TPLO surgery in dogs to ensure proper recovery and care.
Sustainable Vet Group
Many owners are surprised to find their dog's ankle swollen after TPLO surgery especially when the surgery was performed on the knee, which is well above the ankle.
This gravity-dependent swelling is one of the most common post-TPLO findings, and in most cases it is a completely normal part of recovery.
Knowing what causes it, when it is expected, and when it becomes a reason to call your vet puts you in a much better position during recovery.
Quick answer: Ankle swelling 3 to 5 days post-TPLO is normal — gravity pools post-surgical fluid at the ankle. Resolves in 1 to 2 weeks with rest and cold packing. Call your vet if swelling is hot, fast-growing, or discharging.
Key takeaways
- Ankle swelling at 3 to 5 days post-TPLO is normal: fluid from the knee surgical site tracks down the leg; TPLO Info confirms this is routine
- Gravity pulls fluid to the ankle: dogs do not elevate the leg during recovery, so post-surgical fluid migrates downward
- Normal ankle swelling is mild, soft, and non-painful: not hot, red, rapidly growing, or producing any discharge
- Cold packing and gentle massage help resolve ankle swelling: they reduce inflammation and encourage fluid movement
- Excessive activity worsens ankle swelling: running, jumping, or sustained weight-bearing beyond short leash walks increases fluid accumulation
- Infection is the main abnormal cause: infected swelling is warm, painful, and accompanied by fever or lethargy
Why does ankle swelling happen after TPLO?
TPLO surgery is performed at the proximal tibia just below the knee. However, the inflammatory response and fluid production that result from surgery are not confined to the exact surgical site.
Gravity-dependent fluid migration: post-surgical serum and inflammatory fluid produced at the knee level migrate downward along tissue planes. Because dogs do not elevate their legs during recovery unlike a human keeping a leg raised on a pillow this fluid pools in the lower leg and ankle region.
TPLO Info confirms ankle swelling at 3 to 5 days post-TPLO is completely normal and recommends massage and icing if this occurs.
Lymphatic disruption: the surgery disrupts local lymphatic vessels that normally drain fluid from the lower leg. Until these pathways regenerate or compensate, fluid accumulation in the lower leg is common.
Reduced movement: when a dog is resting with the leg dependent (hanging down), fluid accumulates. Brief controlled leash walks stimulate the lymphatic pump and muscle contractions that help move fluid back up the leg.
Normal ankle swelling: what to expect
Normal post-TPLO ankle swelling typically:
- Appears at day 3 to 5 post-surgery
- Is soft and pitting (you can press on it and it indents temporarily)
- Is not warm to the touch
- Does not produce any discharge
- Does not cause significant additional pain beyond the expected post-operative discomfort
- Gradually reduces over 1 to 2 weeks with rest and activity restriction
VCA Animal Hospitals notes that mild to moderate swelling is expected after TPLO surgery as the body responds to tissue trauma and the healing process begins.
Abnormal ankle swelling: warning signs
Contact your veterinarian if you observe:
- Swelling that is rapidly increasing especially in the first 1 to 2 weeks
- Warmth or heat in the swollen area beyond mild
- Redness or skin discoloration around the ankle or lower leg
- Discharge or pus from the surgical incision or surrounding skin
- Your dog refusing to bear any weight on the leg
- Fever, lethargy, or loss of appetite alongside the swelling
- Swelling that is growing rather than shrinking after the first week
These signs suggest infection, hematoma, or a complication beyond normal gravity-dependent fluid pooling.
How to manage ankle swelling at home
Cold packing: apply a cold pack (frozen peas wrapped in a thin towel) to the ankle for 10 to 15 minutes, 2 to 3 times daily. Cold reduces local inflammation and provides mild pain relief. Always wrap the cold pack never apply ice directly to skin.
Gentle massage: TPLO Info recommends gentle massage if ankle swelling develops. Using a light hand, massage from the ankle upward toward the knee to encourage fluid to move back toward the body. Do not massage the surgical incision site itself.
Activity restriction: the most important intervention. Every unnecessary step the dog takes increases fluid production and worsens swelling. Strict confinement with leash-only bathroom walks is essential for the first 6 to 8 weeks.
Short controlled leash walks: paradoxically, very short leash walks (5 to 10 minutes) are better than complete immobility. Gentle controlled movement stimulates the lymphatic pump and helps clear fluid more effectively than prolonged rest. Do not allow the dog to run, jump, or play.
Timeline: when should ankle swelling resolve?
Most normal ankle swelling resolves within 1 to 2 weeks of surgery when activity restriction is maintained.
Vetplayas notes that swelling is a common response to surgical intervention and typically improves as healing progresses.
Persistent ankle swelling beyond 2 to 3 weeks, or swelling that worsens rather than improves, warrants a veterinary recheck.
This may indicate a seroma has formed in the lower leg, or that the dog is more active than recommended.
For the full fluid buildup and seroma guide, see fluid buildup after TPLO surgery in dogs.
For the full swelling timeline and duration guide, see how long does swelling last after TPLO surgery. For the complete complications overview, see 15 common complications after TPLO surgery in dogs.
For the incision infection guide, see TPLO incision infection symptoms and prevention.
Frequently asked questions
Is ankle swelling after TPLO always from the surgery?
In the first 1 to 3 weeks post-surgery, yes ankle swelling almost always relates directly to the procedure.
Rarely, a dog might develop an unrelated issue (insect sting, foreign body, contact dermatitis) but the timing overwhelmingly points to post-surgical fluid migration in most cases.
Should I wrap my dog's ankle if it's swollen after TPLO?
Only if your vet specifically recommends it. Improper bandaging can cut off circulation or cause pressure sores.
If you are concerned about the ankle swelling, contact your vet before applying any bandage or wrap at home.
My dog's ankle is swollen but the knee looks fine. Is that normal?
Yes. The surgical site at the knee may look relatively normal while the ankle is more visibly swollen because gravity pulls fluid downward.
This pattern is completely consistent with normal post-TPLO fluid migration and is not a sign that something is wrong at the ankle itself.
Can I use a compression sock on my dog's ankle?
Not without veterinary guidance. Human compression garments are not designed for canine anatomy and can cause pressure injury, especially around the hock joint.
If compression is indicated, your vet will apply an appropriate veterinary bandage.
When should I take my dog back to the vet for ankle swelling?
If the swelling appears within the first 1 to 2 weeks and is mild, soft, and not causing distress monitor at home with cold packing and massage.
If it is growing, warm, accompanied by redness or discharge, or if your dog is in significant pain, contact your vet promptly rather than waiting for a scheduled recheck.
Resources
- TPLO Info. Recovery FAQs. tploinfo.com
- VCA Animal Hospitals. Tibial Plateau Leveling Osteotomy (TPLO) in Dogs. vcahospitals.com
- Vetplayas. Understanding Swelling After TPLO Surgery. vetplayas.com
- Midwest Veterinary Specialists. Post-Operative Care Following TPLO. midwestveterinaryspecialists.com

Pressure Necrosis in Dogs: Causes, Symptoms & Care
Learn about pressure necrosis in dogs, including causes, symptoms, and effective care to protect your pet's health.
Sustainable Vet Group
Pressure necrosis in dogs also called decubital ulcers or bedsores is the progressive death of skin and underlying tissue caused by sustained pressure cutting off blood supply. It follows the same biological mechanism as bedsores in bedridden humans, and it is a real and preventable risk for any dog that spends long periods lying in one position.
The condition is deceptive: it starts as a small area of hair loss and can advance to a deep open wound reaching muscle or bone within days. Recognizing it at Stage 1 is the goal.
Quick answer: Pressure necrosis occurs when sustained pressure on bony prominences like elbows and hips cuts off blood flow, killing tissue. It is most common in senior, immobile, or post-surgical dogs. Early signs are hair loss and redness.
Key takeaways
- Prolonged pressure on bony prominences blocks blood flow and causes tissue death from the inside out
- Senior, large-breed, paralyzed, and post-surgical dogs are at highest risk
- Common sites include the elbows, hips, hocks, and the outside of the knees
- Stage 1 (hair loss and redness) is the ideal intervention point; the wound has not yet opened
- Stage 3 and 4 wounds require surgical debridement and often systemic antibiotics
- Orthopedic foam bedding plus repositioning every 2 to 4 hours is the most effective prevention combination
What causes pressure necrosis in dogs
Walkin' Pets explains the mechanism clearly: "Decubital ulcers form when repeated pressure on an affected area constricts the blood vessels, decreasing the area's blood supply and as the skin is deprived of oxygen, it begins to die."
This process concentrates at bony prominences where bone is close to the skin surface with little muscle or fat as a buffer. In dogs, the most commonly affected sites are:
- Elbows the most frequent site, especially in large and giant breeds
- Lateral hips and hip bones
- Hocks (the ankle joint of the hind leg)
- Stifles (outer surface of the knee)
- Sides of the ribs in dogs that always lie on one side
The damage does not require continuous lying. Ortocanis notes that high pressure over a short period is as damaging as lower pressure sustained over longer periods. A heavy dog that drops onto a hard floor with force can create the same tissue trauma as extended immobility.
Which dogs are most at risk
Any dog can develop pressure necrosis if the conditions are right, but several factors increase risk substantially:
Senior dogs: muscle mass decreases with age, reducing the natural padding over bony prominences. Reduced mobility means longer uninterrupted periods in the same position.
Large and giant breeds: more body weight means greater compressive force at contact points. Dr. Buzby's ToeGrips notes that large breeds are disproportionately affected even when they are healthy and mobile.
Post-surgical patients: strict rest requirements, post-anesthesia sedation, and pain-related reluctance to move all increase time in one position.
Paralyzed or paraplegic dogs: no ability to self-reposition at all. These dogs require active owner repositioning to prevent pressure injury.
Obese dogs: higher body weight amplifies compressive force at every contact point.
Short-coated breeds: less coat means less cushioning between skin and hard surfaces.
For how callus formation at the same pressure sites relates to early pressure damage, see calluses as chronic pressure injuries.
The 4 stages of pressure necrosis
Stage 1: redness and hair loss
The skin over the bony prominence loses hair and becomes pink or red. The area may feel slightly warm but the skin surface is intact. There is no open wound.
What to do: act immediately. Add thick orthopedic padding under the affected area. Increase position changes to every 2 hours. Monitor the site daily. Stage 1 reverses with proper management.
Stage 2: surface skin breakdown
The skin partially breaks down. A shallow blister or open area appears. The wound is painful and the dog will likely lick or chew it, worsening the damage.
What to do: veterinary wound care is needed at this stage. Home management alone is not sufficient. The vet will clean the wound, assess for infection, and prescribe appropriate dressings and possibly antibiotics.
Stage 3: full-thickness wound
The sore extends through the full skin thickness into subcutaneous tissue. WagWalking: "Pressure sores can progress quickly, leading to deep wounds that cause the muscle and bone to become visible."
Infection is common at Stage 3. The wound has discharge and often a foul odor. Bacteria can include Staphylococcus, Pseudomonas, and Enterococcus species.
What to do: aggressive veterinary management including wound debridement, culture-guided antibiotics, and advanced wound dressings.
Stage 4: deep tissue involvement
The wound extends to muscle, tendon, or bone. This is a potentially life-threatening stage. Sepsis (systemic bacterial infection) becomes a risk when deep tissue infection spreads.
What to do: emergency veterinary care. Surgical debridement, hospitalization, IV antibiotics, and possibly reconstructive surgery are required.
Treatment by stage
For Stage 1 and 2 home wound care, clean the area gently with dilute chlorhexidine or mild antiseptic solution. Apply a non-adherent wound dressing and change it daily. Do not use hydrogen peroxide, which damages healing tissue. Keep the dog away from hard surfaces at all times until the wound has closed and resolved.
For how bed sores and pressure necrosis overlap and how prevention differs, see bed sores as a related pressure injury.
Prevention: what actually works
Orthopedic bedding
Thick memory foam or egg-crate foam beds distribute body weight more broadly, reducing peak pressure at bony points. The bedding must not fully compress under the dog's weight to be effective. Check the foam by pressing down firmly: if it bottoms out immediately, it offers little protection for a large dog.
Waterproof covers that can be washed frequently are important for dogs at risk of incontinence, which is common in paralyzed patients.
Repositioning schedule
Reposition an immobile dog every 2 to 4 hours, alternating which side bears weight. This mimics the natural unconscious repositioning healthy dogs do throughout the day.
Ortocanis: "This problem occurs mainly in immobile animals: quadriplegic or paraplegic dogs, elderly dogs or those with serious illnesses."
Daily inspection
Check every bony prominence daily. Run your hand over the elbows, hips, hocks, and knees. Hair loss is the first visible sign act at that point rather than waiting for skin breakdown.
Protective wraps and donut pads
Elbow pads and donut-shaped protective wraps can be placed over at-risk sites to prevent direct contact with hard surfaces. These are particularly useful for dogs that regularly rest on hard floors despite having soft bedding available.
For how swelling from pressure injuries can extend into the feet and legs, see swelling associated with pressure injuries.
Frequently asked questions
How do I know if my dog has a pressure sore starting?
The first sign is a patch of hair loss over a bony prominence such as the elbow or hip, sometimes with mild redness. The skin is still intact at this point. Run your hand along these sites daily in at-risk dogs. If you feel a bare or reddened area, increase padding and position changes immediately and monitor closely for any skin breakdown.
My dog is recovering from surgery and lying down constantly. How do I prevent pressure sores?
Reposition every 2 to 4 hours, alternating sides. Use thick orthopedic foam padding rather than thin blankets or bare floors. Check the elbows, hips, and hocks each time you reposition. Ask your vet at discharge whether there are specific at-risk sites based on your dog's size, breed, and surgical procedure.
The skin over my dog's elbow looks bare and red but is not open. Is this a pressure sore?
Yes, this is Stage 1 pressure necrosis. The tissue is under sustained pressure but has not yet broken down. This is exactly the time to act: add thick padding, protect from friction, and monitor daily. If the skin opens, see your vet within 24 to 48 hours.
Can pressure necrosis be fully healed?
Stage 1 and 2 lesions heal well with proper wound care and pressure relief. Stage 3 and 4 wounds can heal but often leave permanent scar tissue, and may involve months of treatment. Full wound closure at advanced stages is not always achievable and managing infection becomes the primary goal.
What is the best bedding to prevent pressure sores?
Thick memory foam or high-density egg-crate foam is most effective. The padding needs to be dense enough not to fully compress under the dog's full weight. Standard flat beds offer minimal protection for large dogs. Waterproof removable covers allow frequent washing, which reduces infection risk at the skin surface.
Can a pressure sore become life-threatening?
Yes. Stage 3 and 4 wounds can allow bacteria to spread from the wound into deeper tissues or the bloodstream, causing sepsis. A dog with a deep infected ulcer that is also lethargic, off food, or running a fever may be systemically ill and needs emergency veterinary care that day.
Resources
- Dr. Buzby's ToeGrips. Pressure Sores on Dogs: Treatment and Prevention. toegrips.com
- WagWalking. Pressure Sores in Dogs. wagwalking.com
- Walkin' Pets. Pressure Sores in Pets: Treatment and Prevention. walkinpets.com
- Ortocanis. Pressure Ulcers in Convalescent Dogs. ortocanis.com
- DogCancer.com. Bed Sores on Dogs: Preventing and Treating Pressure Sores. dogcancer.com

Why Your Dog Won't Drink Water After Surgery
Learn why your dog won't drink water after surgery and how to help them recover safely with practical tips and expert advice.
Sustainable Vet Group
After surgery, it is common for dogs to refuse water. This can worry any pet owner because hydration is vital for healing. Understanding why your dog won't drink water after surgery helps you support their recovery better.
This article explains the main reasons dogs avoid water post-surgery. You will learn what signs to watch for and how to encourage your dog to drink safely. Knowing these facts can prevent complications and keep your dog comfortable.
Why does my dog refuse water after surgery?
Dogs may refuse water after surgery due to pain, nausea, or medication effects. These factors can reduce their desire to drink and make swallowing uncomfortable.
It is important to identify the cause to provide proper care. Sometimes, refusal is temporary, but other times it signals a problem needing veterinary attention.
- Pain and discomfort: Surgical pain can make your dog reluctant to move or swallow, reducing their interest in drinking water during recovery.
- Nausea from anesthesia: Anesthesia can cause nausea or vomiting, which lowers your dog's urge to drink and may make water unappealing.
- Medication side effects: Some painkillers or antibiotics cause dry mouth or upset stomach, affecting your dog's willingness to drink water.
- Stress and anxiety: Being in a new environment or feeling unwell can cause stress, leading to decreased water intake after surgery.
Recognizing these reasons helps you monitor your dog closely and take steps to encourage hydration safely.
How can I encourage my dog to drink water after surgery?
Encouraging your dog to drink water after surgery requires patience and gentle methods. You want to avoid forcing water but still keep them hydrated.
Using appealing techniques can stimulate their interest and make drinking easier during recovery.
- Offer fresh water frequently: Change the water often to keep it fresh and appealing, which can encourage your dog to drink more willingly.
- Use a syringe or dropper: Gently offer small amounts of water with a syringe if your dog refuses to drink on their own, avoiding stress or choking.
- Add flavor to water: Mixing a little low-sodium broth or water from wet food can make water tastier and more inviting for your dog.
- Provide ice cubes or wet treats: Some dogs prefer licking ice cubes or moist treats, which helps increase fluid intake without forcing them to drink.
These methods can help maintain hydration while respecting your dog's comfort and recovery pace.
When should I worry if my dog won’t drink water after surgery?
Not drinking water for a short time after surgery can be normal. However, prolonged refusal may lead to dehydration and complications.
You should watch for warning signs that indicate your dog needs veterinary care promptly.
- Signs of dehydration: Dry gums, sunken eyes, and lethargy are signs your dog may be dehydrated and need immediate attention.
- Persistent vomiting or diarrhea: These symptoms can worsen dehydration and indicate underlying problems requiring treatment.
- Refusal to eat or drink beyond 24 hours: If your dog avoids all fluids and food for more than a day, it is a serious concern needing veterinary evaluation.
- Excessive panting or weakness: These signs may indicate pain, stress, or dehydration that needs prompt management.
If you notice any of these signs, contact your veterinarian immediately to prevent serious health issues.
What are the risks of dehydration after surgery in dogs?
Dehydration after surgery can slow healing and cause serious health problems. It affects blood flow, organ function, and overall recovery.
Understanding these risks helps you prioritize hydration and seek help if your dog refuses water.
- Delayed wound healing: Lack of fluids reduces blood flow, slowing tissue repair and increasing infection risk after surgery.
- Kidney damage: Dehydration stresses the kidneys, potentially causing acute injury or worsening existing kidney problems.
- Electrolyte imbalance: Fluids maintain electrolyte balance; dehydration can cause dangerous imbalances affecting heart and muscle function.
- Increased risk of complications: Dehydration can lead to weakness, shock, or other complications that prolong hospital stays and recovery time.
Keeping your dog hydrated supports faster healing and reduces the chance of these serious complications.
How does anesthesia affect my dog’s thirst after surgery?
Anesthesia impacts your dog's body in ways that reduce thirst and water intake temporarily. Understanding these effects helps you manage hydration better.
Most dogs regain normal thirst within 24 hours, but some may need extra encouragement.
- Dry mouth sensation: Anesthesia can cause dry mouth, making swallowing uncomfortable and reducing the desire to drink water.
- Slowed digestive system: Anesthesia slows gut movement, causing nausea or bloating that discourages drinking.
- Altered thirst signals: Anesthesia affects brain centers controlling thirst, temporarily lowering your dog's urge to drink.
- Temporary weakness: Post-anesthesia weakness can make your dog less active and less interested in drinking water.
Monitoring your dog closely after anesthesia and offering water gently can help them recover normal hydration habits.
What veterinary treatments help dogs drink water after surgery?
If your dog refuses water after surgery, veterinarians have treatments to support hydration and comfort. These treatments aim to prevent dehydration and promote healing.
Knowing these options prepares you to seek timely help if home care is insufficient.
- Intravenous fluids: IV fluids provide immediate hydration when your dog cannot drink, supporting vital organ function during recovery.
- Anti-nausea medications: These drugs reduce vomiting and nausea, making your dog more willing to drink water and eat.
- Pain management: Adjusting pain medications can reduce discomfort that prevents drinking and improve your dog's willingness to hydrate.
- Appetite stimulants: In some cases, vets may prescribe medications to encourage eating and drinking if your dog remains reluctant.
Veterinary intervention ensures your dog stays hydrated and comfortable, reducing risks during the critical post-surgery period.
Conclusion
Understanding why your dog won't drink water after surgery is key to supporting their recovery. Causes like pain, nausea, and medication effects often reduce thirst temporarily.
Using gentle encouragement methods and watching for warning signs helps keep your dog hydrated and safe. If refusal to drink persists, seek veterinary care promptly to prevent dehydration and complications.
FAQs
How long after surgery should my dog start drinking water?
Most dogs begin drinking water within 12 to 24 hours after surgery. If your dog refuses water beyond this period, contact your veterinarian for advice.
Can I give my dog ice chips instead of water after surgery?
Yes, offering ice chips can help increase fluid intake gently and may be more appealing to dogs reluctant to drink water directly.
Is it safe to add flavor to my dog’s water after surgery?
Adding low-sodium broth or water from wet food can make water tastier and encourage drinking, but avoid salty or sugary additives.
When should I call the vet if my dog won’t drink after surgery?
Call your vet if your dog refuses water for more than 24 hours or shows signs of dehydration, vomiting, or weakness after surgery.
Can dehydration after surgery cause serious health problems in dogs?
Yes, dehydration can delay healing, cause kidney damage, and lead to electrolyte imbalances, making it a serious concern after surgery.
How Soon Can a Dog Walk After TPLO Surgery?
Learn when your dog can safely start walking after TPLO surgery and how to support recovery with proper care and guidance.
Dr. Kate Margalit
TPLO (Tibial Plateau Leveling Osteotomy) surgery is one of the most common and successful procedures performed to stabilize the knee after a cranial cruciate ligament (CCL) tear in dogs.
While many pet parents expect their dog to immediately stop limping after surgery, recovery is a gradual healing process. It requires structure, careful activity restriction, and close adherence to surgical recommendations to achieve the best long-term outcome.
At SustainableVet, we emphasize that recovery is just as important as the surgery itself. The goal after TPLO surgery is not simply to get your dog walking quickly. It is to allow the bone and soft tissues to heal properly while safely rebuilding strength, comfort, and confidence in the limb.
When Can a Dog Start Walking After TPLO Surgery?
One of the most common questions after surgery is how soon dogs can walk again. The short answer: dogs are encouraged to begin controlled limb use early in recovery, but activity must remain extremely restricted while the bone heals.
We want your dog to use the operated leg, but not overuse it.
Most dogs will begin toe-touching on the operated leg within the first several days after surgery. Limping is expected during the early recovery period. What we want to see is gradual improvement over time:
- More consistent weight bearing
- Improvement in muscle mass
- Improved comfort during controlled, regimented leash walks
While early limb use is encouraging, it is crucial to understand that the bone itself is still healing internally. That process typically takes 8 to 12 weeks.
TPLO Recovery Timeline at a Glance
Indoor Recovery: 8 to 12 Weeks
During the entire recovery, exercise restriction is critical. Crate confinement or restriction to a small area with good traction is strongly recommended. Most dogs will slip and slide on hardwood floors and can easily injure themselves inside the house when not confined.
Days 1 to 10: Initial Rest Period
During the first 7 to 10 days after surgery, walking is restricted to short, slow leash walks only for bathroom breaks. These walks should be calm, controlled, and limited to what is necessary.
Days 10 to 14: First Recheck Appointment
By the first recheck appointment, many dogs are partially weight-bearing during a controlled, slow walk.
At this stage, your veterinary team will evaluate the incision, swelling, comfort level, and early limb use. Even if your dog is doing well, activity should still remain very restricted.
Weeks 2 to 8: Gradual Activity Increase
As healing progresses, 10 to 15 minute leash walks may be introduced to build more strength, reduce stiffness, and encourage bony healing without overloading the leg.
Walking activity and physical therapy are gradually increased according to your surgeon's recommendations. This stage is not about testing how much your dog can do. It is about safely rebuilding muscle mass while protecting the healing bone.
Weeks 8 to 12: Final Healing and Recheck
At the final recheck appointment, radiographs (X-rays) are typically performed to assess bone healing.
By this stage, many dogs have minimal or no lameness during controlled activity. If the osteotomy has healed adequately, your surgeon may recommend a gradual transition back toward more normal activity.
Why Strict Rest Is Required After TPLO: The Mechanics
During a TPLO procedure, a precise geometric cut is made in the tibia. The bone is then rotated into a new position and stabilized using a specialized metal plate and screws.
Until the bone heals, the plate and screws are responsible for maintaining the new bone position and protecting the osteotomy during normal controlled movement.
Excessive activity, slipping, jumping, or twisting too early can place forces on the repair that it is not yet ready to tolerate.
Even if your dog appears comfortable and eager to do more, unrestricted activity too early can create significant complications before the bone has fully healed.
Recovery after TPLO surgery is truly a situation where slow and steady wins the race.
Factors That Affect TPLO Walking Recovery Time
Recovery time depends on several individual factors. These influence how quickly walking progresses and how carefully activity must be advanced.
Postoperative Care
Strict environmental management, appropriate pain control, and structured rehabilitation directly support a safer recovery. This includes using a leash at all times outdoors, preventing stairs and jumping, keeping floors non-slip, and following medication and activity instructions closely.
Presence of Complications
Issues such as incision problems, infection, implant failure, delayed bone healing, or fracture can extend the recovery timeline and delay walking progression.
Any sudden worsening in lameness, swelling, pain, or reluctance to use the limb should be reported to your veterinary team immediately.
How to Safely Support Your Dog's Mobility During Recovery
A structured support plan improves long-term outcomes and reduces the risk of setbacks.
Use a Short Leash and Harness at All Times
All walks during recovery must remain on a short leash with a slow, controlled pace. A harness can help control movement and prevent sudden lunging or twisting.
Your dog should not be allowed to run ahead, play, greet other dogs energetically, or move unpredictably during recovery walks.
Stick to Strict Exercise Limits
Follow your veterinarian's recommended walking times and avoid any off-leash activity, running, jumping, or rough play.
Many complications occur not because a dog was walking, but because the dog suddenly slipped, jumped, twisted, or did too much too soon.
Prioritize Pain Management
Administer all prescribed pain medications on schedule. Good pain control keeps your dog comfortable and encourages more even, controlled weight-bearing during brief walks.
Do not stop medications early unless your veterinarian advises you to do so.
Incorporate Professional Physical Therapy
Gentle range-of-motion exercises may help reduce stiffness early in recovery. As healing permits, rehabilitation options such as controlled strengthening exercises, hydrotherapy, or underwater treadmill sessions may help rebuild muscle while reducing stress on the limb.
Working with a certified canine rehabilitation specialist allows for a customized plan that helps restore joint flexibility, rebuild muscle, improve comfort, and support a safe return to normal mobility.
Risks of Walking Too Soon or Too Much After TPLO Surgery
Being cautious protects the surgical repair. Allowing your dog to run, jump, slip, or play too early carries real clinical risks.
Implant Strain or Failure
Excessive weight-bearing, sudden twisting, or impact forces too early can place abnormal stress on the plate and screws. In severe cases, implants can loosen or fail, requiring additional treatment or corrective surgery.
Delayed Bone Healing
Too much motion or repeated stress at the surgical site can slow the bone's ability to heal properly, prolonging the total recovery period.
Increased Pain and Inflammation
Overexertion can cause swelling, soreness, and joint inflammation. This may make your dog less willing to use the leg and can delay functional recovery.
Setbacks in Recovery
Too much activity too soon can cause limping, soft tissue irritation, swelling around the surgical site, or a slower return to comfortable walking. In some cases, setbacks require a longer rehabilitation plan or additional veterinary care.
Frequently Asked Questions
How long should my dog be confined after TPLO surgery?
Your dog needs indoor confinement for the entire two to three months of recovery. Confinement prevents accidental running, jumping, and rough movement.
Can I let my dog run or jump after TPLO surgery?
No. Running, jumping, stair use, and off-leash activity are restricted for approximately 8 to 12 weeks. The exact timeline depends on your dog's healing and X-ray findings.
What signs show my dog is recovering well and ready for longer walks?
Positive signs include reduced swelling, steady comfort levels, consistent toe-touching, and gradual improvement in walking quality. Always confirm with your veterinary team before increasing walk duration.
Is physical therapy necessary after TPLO surgery?
Some dogs recover well with structured home care alone, but physical therapy is always an excellent adjunct to build muscle strength and improve use of the operated leg.
When can my dog return to full, normal activity?
Most dogs achieve adequate bone and soft tissue healing between 8 and 12 weeks after surgery. Full activity should only resume gradually after follow-up X-rays confirm the osteotomy has healed and your surgeon provides formal approval.
Final Thoughts
Dogs are often ready to do more before their bone is ready to tolerate more. Dogs will not moderate their own activity. That is why TPLO recovery requires a balance between early controlled limb use and strict protection of the surgical repair.
With appropriate rest, controlled leash activity, pain management, follow-up care, and rehabilitation when needed, most dogs return to comfortable, active lives after TPLO surgery.
About this Collaboration: Successful healing happens both inside and outside the operating room. This article combines structured veterinary rehabilitation guidelines with direct clinical insights from veterinary orthopedic surgeons to support pet parents through every stage of the recovery journey.

Acrochordons and Plaque Lesions in Dogs
Learn about acrochordons and plaque lesions in dogs, their causes, symptoms, diagnosis, and treatment options for pet owners.
Sustainable Vet Group
Acrochordons and plaque lesions are common skin conditions in dogs that can cause concern for pet owners. These growths often appear as small, soft bumps or raised plaques on the skin and can vary in size and number. Understanding what these lesions are and how they affect your dog is important for timely diagnosis and treatment.
This article explains the causes, signs, diagnosis, and treatment options for acrochordons and plaque lesions in dogs. You will learn how to recognize these skin changes and when to seek veterinary care to keep your dog comfortable and healthy.
What are acrochordons and plaque lesions in dogs?
Acrochordons, also known as skin tags, are benign skin growths that appear as small, soft, and often pedunculated bumps on a dog's skin. Plaque lesions are raised, flat-topped areas of thickened skin that may result from chronic irritation or inflammation.
Both types of lesions are usually non-cancerous but can sometimes indicate underlying health issues. Recognizing these lesions early helps in managing them effectively.
- Acrochordon characteristics: These are soft, flesh-colored or slightly pigmented skin tags that hang from the skin by a narrow stalk and are usually painless.
- Plaque lesion features: Plaques are flat or slightly raised, thickened areas of skin that can be scaly or crusty, often caused by chronic skin irritation.
- Common locations: Both lesions commonly appear on areas like the neck, chest, abdomen, and near the limbs where skin folds or friction occur.
- Benign nature: Most acrochordons and plaques are harmless but should be monitored for changes in size, color, or ulceration.
Understanding these lesions helps pet owners distinguish between harmless growths and those needing veterinary attention.
What causes acrochordons and plaque lesions in dogs?
The exact causes of acrochordons and plaque lesions in dogs are not always clear but often relate to skin irritation, genetics, or underlying diseases. Several factors can contribute to their development.
Knowing these causes can help in preventing or managing the lesions effectively.
- Chronic skin irritation: Repeated rubbing or friction on certain skin areas can lead to the formation of acrochordons and plaques over time.
- Genetic predisposition: Some dog breeds may be more prone to developing these skin lesions due to inherited skin characteristics.
- Hormonal influences: Hormonal imbalances, especially in older dogs, can promote the growth of skin tags and plaques.
- Underlying skin diseases: Conditions like allergies, infections, or autoimmune disorders can cause skin changes that result in plaque formation.
Identifying and addressing these causes is key to managing your dog's skin health and preventing lesion recurrence.
How can you recognize acrochordons and plaque lesions in your dog?
Recognizing these skin lesions early allows for prompt veterinary evaluation. Owners should regularly check their dog's skin for any new or changing growths.
Knowing the typical appearance and symptoms of acrochordons and plaques helps in distinguishing them from other skin problems.
- Appearance of acrochordons: Look for small, soft, skin-colored or slightly pigmented bumps that hang from the skin by a narrow stalk.
- Appearance of plaques: Identify raised, flat-topped, thickened skin areas that may be scaly, crusty, or discolored.
- Symptoms to watch: Most lesions are painless, but watch for itching, bleeding, or ulceration which require veterinary attention.
- Changes over time: Monitor any rapid growth, color changes, or ulceration as these may indicate complications.
Regular skin checks and noting any changes help in early detection and treatment of these lesions.
How are acrochordons and plaque lesions diagnosed in dogs?
Diagnosis involves a veterinary examination and may include additional tests to rule out other skin conditions or malignancies. Accurate diagnosis ensures appropriate treatment.
Your veterinarian will assess the lesions and may recommend diagnostic procedures based on the lesion's appearance and your dog's health history.
- Physical examination: The vet will visually and physically examine the lesions and surrounding skin for signs of infection or malignancy.
- Skin scrapings or cytology: Samples from the lesion may be taken to check for infections or abnormal cells under a microscope.
- Biopsy and histopathology: A small tissue sample may be surgically removed and analyzed to confirm the lesion type and rule out cancer.
- Blood tests: These may be done to check for underlying systemic diseases that could contribute to skin changes.
Proper diagnosis helps differentiate benign lesions from more serious conditions and guides treatment decisions.
What treatment options are available for acrochordons and plaque lesions in dogs?
Treatment depends on the lesion type, size, location, and whether it causes discomfort or complications. Many lesions do not require treatment unless problematic.
Your veterinarian will recommend the best approach based on your dog's specific condition and overall health.
- Surgical removal: Small acrochordons or plaques causing irritation can be removed surgically under local or general anesthesia.
- Cryotherapy: Freezing the lesion with liquid nitrogen can be effective for some skin tags and plaques.
- Topical treatments: Medicated creams or ointments may reduce inflammation or secondary infections associated with plaques.
- Monitoring without treatment: If lesions are benign and not causing issues, regular monitoring may be advised instead of immediate removal.
Choosing the right treatment minimizes discomfort and prevents lesion recurrence or complications.
How can you prevent acrochordons and plaque lesions in your dog?
While not all lesions can be prevented, certain measures can reduce the risk or severity of acrochordons and plaque lesions. Good skin care and health maintenance are essential.
Implementing preventive strategies helps keep your dog's skin healthy and reduces the chance of lesion development.
- Maintain skin hygiene: Regular grooming and cleaning reduce dirt and bacteria that can irritate the skin and cause lesions.
- Manage allergies: Controlling environmental or food allergies prevents chronic skin inflammation that leads to plaques.
- Reduce friction: Avoid tight collars or harnesses that cause rubbing and skin irritation in vulnerable areas.
- Regular veterinary check-ups: Routine exams help detect early skin changes and address underlying health issues promptly.
Consistent care and attention to your dog's skin condition support overall health and comfort.
What are the potential complications of untreated acrochordons and plaque lesions?
Although often benign, untreated lesions can sometimes lead to complications such as infection, discomfort, or rarely, malignant transformation. Understanding these risks helps in deciding when to seek treatment.
Monitoring and timely veterinary care reduce the chance of complications and improve your dog's quality of life.
- Secondary infections: Lesions that ulcerate or are scratched can become infected, causing pain and requiring antibiotics.
- Discomfort and itching: Large or irritated lesions may cause itching or discomfort, affecting your dog's behavior and wellbeing.
- Interference with movement: Lesions near joints or skin folds can restrict movement or cause irritation during activity.
- Rare malignancy: Though uncommon, some lesions may develop into cancer, making early diagnosis critical.
Prompt veterinary evaluation and treatment prevent these complications and ensure your dog remains healthy and comfortable.
Conclusion
Acrochordons and plaque lesions in dogs are common skin growths that are usually benign but require attention to avoid complications. Recognizing these lesions early and understanding their causes help you provide the best care for your dog.
Regular skin checks, good hygiene, and timely veterinary visits are essential to manage these conditions effectively. If you notice any new or changing skin lesions on your dog, consult your veterinarian for proper diagnosis and treatment to keep your pet healthy and comfortable.
What causes acrochordons in dogs?
Acrochordons in dogs are caused mainly by chronic skin irritation, genetics, and hormonal changes, often appearing in areas with skin folds or friction.
Are plaque lesions in dogs dangerous?
Most plaque lesions are benign but can cause discomfort or infection if untreated; rare cases may require veterinary evaluation to rule out malignancy.
How are skin tags removed from dogs?
Skin tags can be removed surgically or by cryotherapy under veterinary care, especially if they cause irritation or grow in size.
Can acrochordons turn into cancer in dogs?
Acrochordons are usually benign and rarely become cancerous, but any rapid changes in size or appearance should be checked by a vet.
How often should I check my dog’s skin for lesions?
It is recommended to check your dog's skin monthly for any new or changing lesions and consult a vet if you notice abnormalities.
Patellar Tendonitis After TPLO Surgery in Dogs
Learn about patellar tendonitis after TPLO surgery in dogs, including causes, symptoms, treatment, and recovery tips for pet owners.
Sustainable Vet Group
Patellar tendonitis more precisely called patellar desmopathy or patellar ligament desmitis in veterinary literature is a recognized complication of TPLO surgery. It is also one of the most under-discussed.
Research published in PMC shows radiographic evidence of patellar ligament thickening in 93% of dogs at 4 weeks after TPLO, though most cases are asymptomatic.
Understanding what this condition is, when it becomes a clinical problem, and how it is treated helps owners navigate one of the more commonly missed post-TPLO findings.
Quick answer: Patellar desmitis after TPLO is inflammation and thickening of the patellar ligament. Radiographic thickening occurs in 93% of TPLO dogs at 4 weeks but is usually asymptomatic. Clinically significant cases cause pain and increased lameness. Most are self-limiting; shock wave therapy accelerates resolution.
Key takeaways
- Radiographic patellar ligament thickening occurs in 93% of TPLO dogs at 4 weeks: most are asymptomatic and self-limiting
- Clinically significant patellar desmitis causes pain, swelling, and increased lameness beyond expected post-op discomfort
- TPLO changes stifle biomechanics and increases patellar tendon load: this explains why desmitis occurs more after TPLO
- Shock wave therapy (SWT) significantly reduced patellar ligament thickness at weeks 6 and 8 in a 2012 clinical trial
- Most cases are self-limiting: rest and NSAIDs resolve the majority of clinically significant cases within weeks to months
- Excessive post-operative activity is a modifiable risk factor: strict restriction in the first 8 weeks reduces desmitis risk
What is patellar desmitis after TPLO?
The patellar ligament runs from the kneecap (patella) to the tibial tuberosity — the bony bump just below the knee on the front of the tibia.
It is a critical structure for leg extension and stifle stability.
After TPLO surgery, the biomechanics of the stifle change fundamentally. The tibial plateau is rotated and held at a new angle.
This changes how forces are distributed around the knee, including the forces that pass through the patellar ligament.
The patellar ligament experiences altered tension and loading patterns after TPLO that it did not experience before surgery.
PMC research (2025 retrospective study) confirms desmopathy typically develops within 2.5 months after surgery, affecting the distal portion, and that TPLO causes more ligament thickening than other CCL repair methods.
A separate PMC study using elastosonography confirmed that patellar tendon tendinopathy can be easily detected clinically but that the exact damage evaluation is challenging without ultrasound or advanced imaging.
Why does TPLO cause patellar tendonitis?
Several mechanisms contribute:
Altered stifle biomechanics: TPLO changes the angle of the tibial plateau and the position of the tibial tuberosity relative to the femur. This alters patellar tendon geometry and tension during weight-bearing.
Surgical trauma: retraction and manipulation of soft tissues around the tibial tuberosity during the procedure causes local inflammatory changes that can involve the patellar tendon.
Intraoperative tension increase: rotating the proximal tibial segment may change the tension in the patellar tendon directly, especially during the initial healing phase.
Excessive postoperative exercise: Clinicians Brief's treatment review notes that excessive postoperative exercise is a commonly proposed contributing factor. Dogs allowed too much activity too early are more likely to develop clinically significant desmitis.
How common is patellar desmitis after TPLO?
Radiographic evidence of patellar ligament thickening at 4 weeks post-TPLO is reported in 93% of dogs in clinical studies.
The vast majority of these dogs have no clinical signs the radiographic finding does not translate into a symptomatic problem for most patients.
Clinically significant desmitis where the dog shows pain and lameness attributable to the patellar ligament specifically is less common but well-recognized by veterinary orthopedic surgeons.
Laguna Hills Animal Hospital notes that patellar tendinosis is relatively benign in most cases and improves with rest and medication.
Signs of clinically significant patellar desmitis
Unlike the asymptomatic radiographic finding, clinical patellar desmitis produces:
- Pain on direct palpation of the patellar ligament (between the kneecap and tibial tuberosity)
- Swelling or thickening directly over the ligament
- Lameness that is worse than expected for the dog's recovery stage
- Reluctance to fully extend the stifle during walking or exercise
- Stiffness after rest that improves briefly with movement
These signs typically appear in the first 6 to 10 weeks after TPLO.
Diagnosis
A veterinarian diagnoses patellar desmitis through:
Physical examination: palpation of the patellar ligament for thickening, pain response, and heat. A dog with significant desmitis will react to direct pressure on the ligament.
Radiographs: thickening of the soft tissue shadow over the patellar ligament on a lateral stifle projection. This is often identified at the routine 4 to 6 week post-TPLO radiographic recheck.
Ultrasound: provides direct visualization of the ligament, showing thickening, fiber disruption, and periligamentous edema. Ultrasound is more sensitive than radiographs and is the preferred modality for detailed assessment.
Treatment
Rest and activity restriction
The foundation of treatment for most cases. Reducing the mechanical load on the patellar ligament allows the inflammatory process to resolve.
Strict activity restriction should already be in place for post-TPLO recovery patellar desmitis is a reason to enforce it rigorously.
NSAIDs
Anti-inflammatory medication reduces pain and local inflammation. Meloxicam or carprofen at appropriate veterinary doses is the standard pharmaceutical approach for most dogs with symptomatic desmitis.
Shock wave therapy (SWT)
Clinicians Brief reviewed a trial of 30 large-breed TPLO dogs: SWT at weeks 4 and 6 significantly reduced patellar ligament thickness on radiographs at weeks 6 and 8 vs. controls.
SWT should be considered for dogs with clinically significant patellar desmitis.
Laser therapy
Low-level laser therapy (photobiomodulation) may reduce local inflammation and support tissue healing, though evidence specific to patellar desmitis after TPLO is limited compared to the SWT evidence base.
For the complete TPLO complications reference, see 15 common complications after TPLO surgery in dogs. For the incision infection guide, see TPLO incision infection symptoms and prevention.
For the general lameness guide that helps distinguish desmitis from other causes of post-TPLO lameness, see lameness after TPLO surgery in dogs.
For the TPLO failure rate context, see TPLO failure rate in dogs explained.
Frequently asked questions
Is patellar tendonitis after TPLO serious?
In most dogs, no. The radiographic finding is near-universal but typically asymptomatic and self-limiting.
Clinically significant desmitis causes pain and increased lameness but usually resolves with rest, NSAIDs, and sometimes shock wave therapy. It rarely causes permanent dysfunction.
How do I know if my dog has patellar tendonitis vs. normal post-TPLO soreness?
The key distinguishing feature is pain specifically on palpation of the patellar ligament the structure running from the kneecap to the bump just below the knee.
Normal post-TPLO soreness is diffuse and improves steadily. Patellar desmitis produces focal pain at this location, often with visible swelling over the ligament.
Can patellar desmitis be prevented?
Strict activity restriction in the first 8 weeks post-TPLO is the most effective preventive measure, since excessive early activity is a recognized contributing factor.
It cannot always be prevented altered biomechanics from the surgery itself play a role regardless of activity level but minimizing mechanical load during the healing phase reduces severity.
Does patellar tendonitis require a second surgery?
Almost never. The vast majority of cases resolve with conservative management. Shock wave therapy is effective in cases that need more active treatment.
Surgical intervention for patellar desmitis after TPLO is extremely rare.
Will this affect my dog's long-term outcome after TPLO?
For most dogs, no. Clinically significant patellar desmitis is typically a temporary complication that resolves during the recovery period.
Long-term stifle function in dogs that develop and recover from patellar desmitis is generally comparable to dogs that do not develop the condition.
Resources
- PMC. Retrospective Study on Patellar Desmopathy Following Surgical Resolution of CCL Rupture in 28 Dogs. ncbi.nlm.nih.gov
- PMC. Radiographic, Ultrasonographic and Shear Elastosonographic Changes in Patellar Ligament in Dogs Undergoing TPLO. ncbi.nlm.nih.gov
- Clinicians Brief. Treating Patellar Ligament Desmitis. cliniciansbrief.com
- Laguna Hills Animal Hospital. TPLO Surgery Complications. lhah.com
- ACVS. Cranial Cruciate Ligament Disease. acvs.org
Can Dogs Get Impetigo?
Learn if dogs can get impetigo, its symptoms, causes, treatment, and prevention tips to keep your pet healthy.
Sustainable Vet Group
Yes, dogs can get impetigo and it is more common than most owners realize, particularly in puppies between 3 and 6 months of age. The condition goes by several names: puppy pyoderma, juvenile pustular dermatitis, and canine impetigo. All refer to the same superficial bacterial skin infection.
Understanding what it looks like, how it differs from similar conditions, and when to call the vet can save your puppy from unnecessary discomfort and prevent complications.
Quick answer: Yes, dogs can get impetigo: a superficial bacterial skin infection from Staphylococcus, most common in puppies aged 3 to 6 months. Pustules appear on the belly and groin. Canine impetigo is not contagious to other dogs.
Key takeaways
- Canine impetigo is caused by Staphylococcus pseudintermedius or Staphylococcus aureus, the staph species responsible for most dog skin infections
- Puppies aged 3 to 6 months are most at risk due to their immature immune systems
- Pustules appear on hairless areas: belly, groin, armpits, and inside the hind legs
- Canine impetigo is not contagious to other dogs, unlike the human version
- Most mild cases resolve with topical antibiotics and medicated shampoo; severe cases need oral antibiotics
- Ringworm and mange can mimic impetigo a vet swab or skin scraping is needed to confirm the diagnosis
What is canine impetigo?
Impetigo in dogs is a superficial pyoderma an infection of the outermost layers of skin. WagWalking classifies it under three types of pyoderma: surface pyoderma (most superficial), superficial bacterial folliculitis (involving hair follicles), and deep pyoderma (penetrating deeper tissue layers). Puppy impetigo is the surface or superficial form.
Pets4Homes explains the mechanism: "It is usually caused by Staphylococcus bacterial strains, including Staphylococcus aureus and Staphylococcus pseudintermedius, which can cause pustules, crusty skin, and discomfort." These bacteria are normally present on healthy dog skin. They cause infection when the skin barrier is disrupted or the immune system is not yet mature enough to control their growth.
Unlike impetigo in humans, which spreads easily between people, Dogtime confirms: "Unlike human impetigo, canine impetigo is not contagious." This is an important distinction for multi-dog households.
Which dogs get impetigo?
Puppies 3 to 6 months
This is by far the most common group. BetterPet explains: "Puppies' immune systems aren't fully developed, making them especially vulnerable to infections." The immune system matures during the first year of life, which is why impetigo is primarily a puppy condition.
Puppies in unsanitary or communal environments
BetterPet notes that "puppies that live in unsanitary conditions are at higher risk. Communal environments like doggie daycares and boarding centers can be breeding grounds for the types of bacteria that can cause skin infections."
Dogs with underlying conditions
Adult dogs can develop impetigo, but it typically signals an underlying problem: allergies causing chronic skin scratching and damage, parasites (fleas, ticks) disrupting the skin barrier, hormonal disorders (hypothyroidism, Cushing's disease) impairing immune function, or other immunocompromising conditions.
What does impetigo look like in dogs?
The hallmark sign is small, pus-filled pustules on hairless or thinly haired areas of skin. Common locations include:
- Belly and abdomen (the most common site in puppies)
- Groin and inner thighs
- Armpits
- Inside the hind legs
- Muzzle and face (less common)
The pustules are fragile. Pets4Homes describes what happens when they rupture: "These pustules are fragile and itchy, rupturing easily to leave sore, inflamed areas that may scab over."
After rupturing, the affected skin develops yellow crusts, redness, and mild hair loss around the lesion. Dogtime notes that "the condition typically affects puppies under one year old" and the lesions cluster in areas where the skin is thinner and more exposed.
How impetigo differs from similar conditions
Impetigo is frequently confused with other skin conditions that look similar. A vet examination is needed to confirm the diagnosis.
WagWalking: "The veterinarian will take a skin scraping to get a tissue sample for microscopic examination, samples of the fluid or pus from the blisters for cytological analysis and direct impression smears of the lesions."
For how pustules connect to other bacterial skin conditions that progress if untreated, see pustules associated with impetigo.
How vets diagnose impetigo
Your vet will start with a visual examination of the pustules and lesion pattern. For puppies with classic presentation on the belly and groin, a clinical diagnosis may be sufficient. For atypical cases or adult dogs, the vet will:
- Skin scraping or swab: examined under a microscope to identify bacteria and rule out mites
- Cytology: direct impression smear from a ruptured pustule to identify bacterial cell types
- Fungal culture: rules out ringworm, which can look similar
- Culture and sensitivity test: used in recurrent or severe cases to identify the specific bacterial strain and guide antibiotic selection
Dogtime: "In some cases, your vet might recommend a culture and sensitivity test to identify the specific bacterial strain and determine the most effective antibiotic treatment."
Treatment options
Mild cases: topical treatment
Most puppy impetigo cases respond well to topical treatment without oral antibiotics. Dogtime lists the approach: "Mild cases of impetigo can often be managed with topical treatments."
Practical steps include:
- Medicated shampoo: chlorhexidine or benzoyl peroxide shampoo used 2 to 3 times per week. These disrupt bacterial colonies on the skin surface.
- Topical antibiotic cream or ointment: applied directly to lesions after cleaning
- Keeping the area dry and clean: moisture encourages bacterial growth
BetterPet notes that "this skin infection in puppies can resolve spontaneously, especially if the cause is related to factors like an unclean environment that a pup is then removed from."
Moderate to severe cases: oral antibiotics
When pustules are widespread, the dog is uncomfortable, or topical treatment has not resolved the infection within 2 to 3 weeks, oral antibiotics are prescribed. Common choices include cephalexin, amoxicillin-clavulanate, or trimethoprim-sulfamethoxazole, typically for 3 to 4 weeks.
WagWalking: "Although this condition may resolve itself without any treatment, antibiotics can speed up the recovery time and prevent spreading."
Underlying cause treatment
In adult dogs, treating impetigo without addressing the underlying cause leads to recurrence. Allergy management, parasite control, or hormonal treatment may be required alongside antibiotic therapy.
Home care during treatment
- Keep the affected skin clean and dry
- Avoid bathing with regular shampoo during treatment use the prescribed medicated formula only
- Prevent licking with an E-collar if the puppy is bothering the lesions
- Do not pop or squeeze pustules this increases the risk of secondary infection and scarring
- Wash bedding frequently to reduce bacterial load in the environment
For how scabs develop from ruptured pustules and bacterial skin infections, see scabs as a sign of skin infection. For how furuncles represent a more severe progression of skin infection beyond impetigo, see furuncles as a progression of skin infection.
Frequently asked questions
Is dog impetigo contagious to humans or other pets?
Canine impetigo caused by Staphylococcus pseudintermedius is not typically contagious to healthy humans or other dogs. However, Staphylococcus aureus strains can occasionally transfer between species. As a precaution, wash hands after handling a puppy with active impetigo and keep other pets separated until the infection is resolved.
How long does impetigo take to clear up in dogs?
Mild cases treated with medicated shampoo and topical antibiotics typically clear within 2 to 3 weeks. Cases requiring oral antibiotics usually resolve within 3 to 4 weeks of starting treatment. If the lesions have not improved after 3 weeks of appropriate treatment, return to the vet the diagnosis may need to be reconsidered or the antibiotic changed based on culture results.
Can impetigo in dogs be mistaken for ringworm?
Yes. Both conditions cause crusty lesions and hair loss in similar areas. The key difference is that ringworm causes circular bald patches and glows under a UV (Wood's) lamp, while impetigo does not. A vet skin scraping and fungal culture can definitively distinguish between them. Do not attempt to treat based on appearance alone.
Do puppies need antibiotics for impetigo?
Not always. Mild cases in healthy puppies in a clean environment often resolve with medicated shampoo baths alone. Your vet will assess whether oral antibiotics are needed based on the severity of the infection, how widespread the pustules are, and whether your puppy seems uncomfortable or systemically unwell.
Can adult dogs get impetigo?
Yes, but it is much less common. Adult dogs that develop impetigo usually have an underlying cause: allergies causing chronic skin damage, external parasites disrupting the skin barrier, or an immunosuppressive condition. A vet will investigate for these factors in any adult dog presenting with impetigo-like lesions.
How do I prevent impetigo from recurring in my puppy?
Keep bedding and living areas clean and dry. Bathe regularly with a mild or pH-balanced dog shampoo. Treat any parasite infestations promptly. Address allergies if your dog chronically licks or scratches. For puppies, the immune system matures over the first year, so most puppies naturally grow out of their susceptibility to recurring impetigo as they age.
Resources
- Dogtime. Puppy Impetigo in Dogs: Symptoms, Causes and Treatments. dogtime.com
- BetterPet. How to Identify and Treat Impetigo in Puppies. betterpet.com
- WagWalking. Puppy Impetigo in Dogs. wagwalking.com
- Pets4Homes. Puppy Impetigo: Causes, Symptoms and Treatment. pets4homes.co.uk
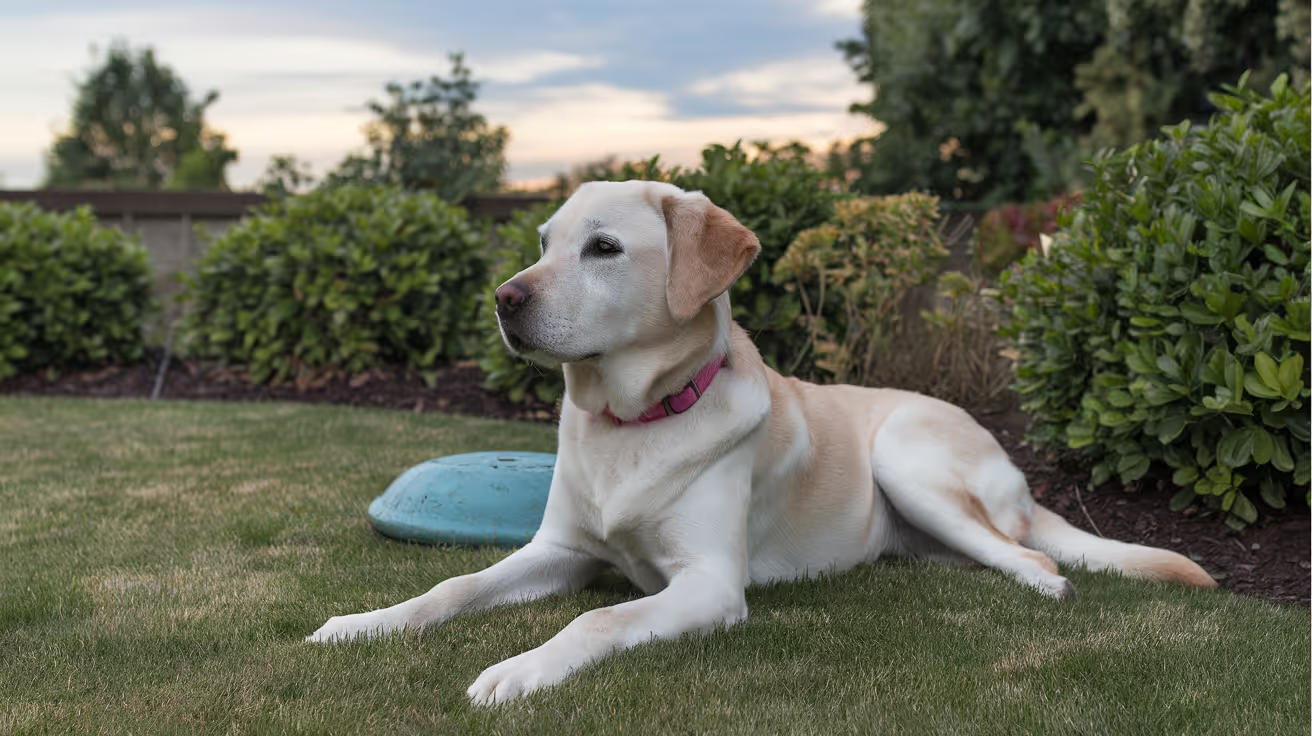
Do Dogs Calm Down After Being Spayed?
Learn how dogs behave after being spayed and when to expect them to calm down post-surgery.
Sustainable Vet Group
It is one of the most common reasons owners choose to spay their female dog. The expectation of a calmer, more settled companion afterward.
Sometimes that is exactly what happens. Sometimes it does not. And in a small subset of cases, anxiety or excitability actually increases.
Understanding why gives you a more accurate picture of what to expect, which makes the outcome less surprising in either direction.
Quick answer: Many dogs do become calmer after spaying, but the effect is specific to hormone-driven behaviors, not overall temperament. Dogs that were restless, anxious, or excitable due to heat cycles typically show significant improvement. Dogs whose energy or anxiety has non-hormonal causes will not reliably calm down. Most behavioral changes, if they occur, appear over two to three months.
Key takeaways
- The calming effect is real but specific: It applies to behaviors driven by reproductive hormones, not all behaviors.
- Heat cycle behaviors disappear: Restlessness, roaming, frequent urination, and cyclical mood shifts all stop after spaying.
- Core energy level and personality do not change: A high-energy dog will still be high-energy after spaying.
- Breed and individual temperament matter: Some breeds retain high energy regardless of hormone status.
- The timeline is weeks to months, not days: Hormone levels decline gradually, so behavioral changes are gradual too.
- A small subset of dogs show increased fearfulness: This is documented in research and worth knowing about before surgery.
What "calming down" actually means after spaying
When people say they want their dog to calm down, they usually mean one of two things:
- They want heat cycle behaviors to stop: the roaming, the restlessness, the vocalization, the constant male attention.
- They want a generally more settled dog overall.
Spaying reliably delivers the first. The second is less predictable.
This distinction is the core of the honest answer to this question.
What spaying removes: the hormonal layer
Spaying removes the ovaries, which are the primary source of estrogen and progesterone. These hormones regulate the reproductive cycle and influence behaviors tied to it.
During heat cycles, which typically occur every six to eight months in adult dogs, estrogen surges create a set of predictable behaviors:
- Restlessness and inability to settle
- Increased vocalization
- Frequent urination in small amounts to signal reproductive status
- Strong drive to escape and find a mate
- Attracting intact male dogs
- Cyclical irritability or anxiety
All of these stop after spaying. The hormonal trigger is permanently removed.
Which dogs calm down most noticeably after spaying
Dogs whose difficult behaviors are primarily or significantly driven by the reproductive cycle show the most consistent improvement after spaying.
Dogs most likely to become calmer:
- Female dogs that showed significant behavior changes during heat cycles, including restlessness, anxiety, and clinginess
- Dogs prone to false pregnancies, with associated nesting, object guarding, and protective behavior
- Dogs that attempted to escape or roam during heat periods
- Dogs whose cyclical mood swings were disruptive to daily life
For these dogs, spaying removes a recurring source of behavioral disruption. The result is often a more predictable, stable dog.
Which dogs may not calm down after spaying
Dogs whose energy level, excitability, or anxiety comes from sources other than reproductive hormones will not reliably settle after spaying.
Dogs less likely to show a calming effect:
- High-energy working or sport breeds where drive is genetic, not hormonal
- Dogs with established anxiety, fearfulness, or reactivity from non-hormonal causes
- Dogs with learned problematic behaviors from their history and environment
- Dogs whose excitability comes from insufficient exercise or mental stimulation
A Border Collie that is highly energetic before spaying will still be highly energetic after. A Labrador that pulls on the leash before spaying will still pull after. These behaviors are not driven by estrogen.
The timeline: when does calming happen?
Behavioral changes from spaying do not happen within days of surgery. The immediate post-surgery period reflects recovery from anesthesia and pain, not hormonal adjustment.
Realistic timeline:
Owners who expect a noticeably calmer dog within days of surgery are working with an inaccurate timeline. The changes are gradual and unfold over weeks to months.
What research says about calming after spaying
The evidence is genuinely mixed, which is worth knowing rather than glossing over.
Supporting the calming effect:
A study of 591 dogs found behavioral problems reduced or eliminated in 59% of spayed females. Heat cycle-related behaviors showed the most consistent improvement. Many owners of females that were particularly difficult during heat cycles report significant positive changes after spaying.
Complicating the picture:
Two large-scale studies using the Canine Behavioral Assessment and Research Questionnaire (C-BARQ) found that sterilization was associated with a roughly 31% increase in fearfulness and a 33% increase in touch sensitivity in some dogs. These findings apply to both males and females.
What does this mean in practice? For a meaningful subset of dogs, spaying does not produce a calmer animal. It may even produce a more anxious one, particularly in dogs that had pre-existing fearfulness or were sterilized at a young age.
This does not mean spaying is wrong for these dogs. It means the behavioral outcome cannot be guaranteed, and expectations should be calibrated accordingly.
For the full picture of all the behavior changes to expect after spaying, including the research on unexpected outcomes, that guide covers the complete behavioral landscape across both sexes.
Does calming depend on the dog's age at spaying?
Yes, and this is one of the most important variables.
Dogs spayed before their first heat cycle:
The hormonal disruption of heat cycles is never established. Many owners report these dogs are consistently more settled than intact females across their lifetime, without ever having the difficult heat cycle period.
Dogs spayed after several heat cycles:
The calming effect from eliminating heat cycles is still real and significant. However, any behaviors that have become habitual through repetition during heat cycles may persist longer or require training to address.
Dogs spayed very young (before 6 months):
Research suggests a higher association with fearfulness in dogs sterilized very early, before hormonal maturity. For whether this applies specifically to puppies, the guide on calming effects specific to female dogs addresses this age-specific question in detail. For the puppy-specific picture, the guide on whether puppies calm down after being spayed covers the developmental nuances unique to younger dogs.
When the expected calming does not happen
If your dog does not seem noticeably calmer after spaying, consider these factors before concluding the surgery did not work.
Check the timeline: Have two to three months passed since surgery? If not, the hormonal adjustment may still be in progress.
Identify the behavior source: Is the behavior you wanted to address actually hormone-driven? If it is not, spaying was never going to address it.
Consider habituation: Some behaviors that started as hormone-driven become habitual over time. The hormone is removed but the habit persists. Consistent training addresses habituated behavior.
Consider an underlying anxiety: If your dog became more fearful or anxious post-surgery, this is a documented outcome in some dogs. A veterinary behaviorist or your regular vet can help evaluate what is happening and what options exist.
Understanding the truth behind the calming effect myth, including why the expectation of calming is sometimes oversold, helps put the variable outcomes in context.
What actually makes dogs calmer long-term
Whether or not spaying produces a calming effect, these factors reliably influence how settled and manageable a dog is:
- Adequate physical exercise: A dog that is genuinely tired is a calmer dog. Exercise needs are determined by breed and individual temperament.
- Mental stimulation: Breed-appropriate mental work, puzzle feeders, training sessions, and enrichment activities reduce restless, problematic behavior.
- Consistent training: Clear, reinforced expectations give dogs a behavioral framework. This is the single most reliable path to a calmer dog.
- Routine and predictability: Dogs settle more easily in stable, predictable environments.
Spaying contributes one element to this picture. It is not a standalone solution.
Frequently asked questions
How long after being spayed will my dog calm down?
If the calming effect is going to occur, most hormone-driven behavioral changes become apparent within two to six weeks as hormone levels decline. Full stabilization typically takes two to three months. Dogs that are still showing challenging behaviors three to four months after surgery are unlikely to improve further from the hormonal change alone.
Will spaying make my high-energy dog less active?
Probably not significantly. Energy level in dogs is primarily determined by breed, genetics, and conditioning. Spaying can cause a modest metabolic slowdown, but it does not reduce drive or enthusiasm. A high-energy breed will still need the same amount of exercise after spaying.
My dog got more anxious after being spayed. Why?
Research has documented increased fearfulness in a subset of dogs after sterilization, associated with a roughly 31% increase in fearfulness in some studies. This appears to occur more often in dogs sterilized at a young age and in dogs with pre-existing anxiety. If your dog shows increased anxiety after spaying, speak to your vet. A referral to a certified veterinary behaviorist may be helpful.
Will spaying help with aggression?
It depends on the type of aggression. Aggression linked to the heat cycle, competition with other female dogs, or false pregnancy guarding often decreases. Fear-based aggression, learned aggression, and resource guarding are not hormone-driven and are not reliably improved by spaying. For whether lower testosterone calms dogs down in the male counterpart to this question, that guide covers the testosterone-behavior link specifically.
Does breed affect whether spaying calms a dog down?
Yes. Breed temperament significantly influences baseline energy and anxiety levels. High-drive working breeds such as Border Collies, Australian Shepherds, and Belgian Malinois have energy and drive that is genetic, not hormonal. Removing reproductive hormones does not change these fundamental breed characteristics. Whether your specific dog falls into a calmer range after spaying depends on what was driving any difficult behavior in the first place.
The calming effect of spaying is real for dogs whose difficult behaviors are hormone-driven. For those dogs, eliminating the heat cycle and its associated hormonal disruption produces a meaningfully more stable animal. For dogs whose energy or anxiety comes from other sources, spaying is still beneficial for health reasons but should not be expected to produce behavioral transformation. The most accurate prediction is not based on "spaying calms dogs" but on "removing a specific hormonal influence changes the behaviors that influence drives."
Resources
The following sources were used as reference and background for this article:
- Stanley Coren, Psychology Today. Are There Behavior Changes When Dogs Are Spayed or Neutered? psychologytoday.com
- PubMed. Changes in the behavior of dogs after castration. pubmed.ncbi.nlm.nih.gov
- ManyPets. Do Dogs Change After Being Neutered or Spayed? manypets.com
- American Veterinary Medical Association (AVMA). Spaying and Neutering. avma.org
- Houndsy. How Spaying Affects Dog Behavior. houndsy.com

Sustainable Vet | Copyright ©2026 | All Rights Reserved

